

Upload Leads
The Upload Leads feature allows you to bulk-import leads into Abstract ONE from an Excel or CSV file. The upload process is a step-by-step wizard where you select a project and campaign, upload your file, map columns to CRM fields, assign leads to users, and review the upload results.
From Upload Leads, you can:
- Import leads in bulk from .csv, .xlsx, or .xls files
- Download a sample sheet to prepare your data
- Map file columns to CRM lead fields
- Assign uploaded leads using Round Robin or specific user assignment
- Review upload results with uploaded, failed, and total counts
Access Upload Leads
Go to:
Sidebar → Manage Pipeline → Lead List
On the Lead List page, click the Upload Leads button at the top right.
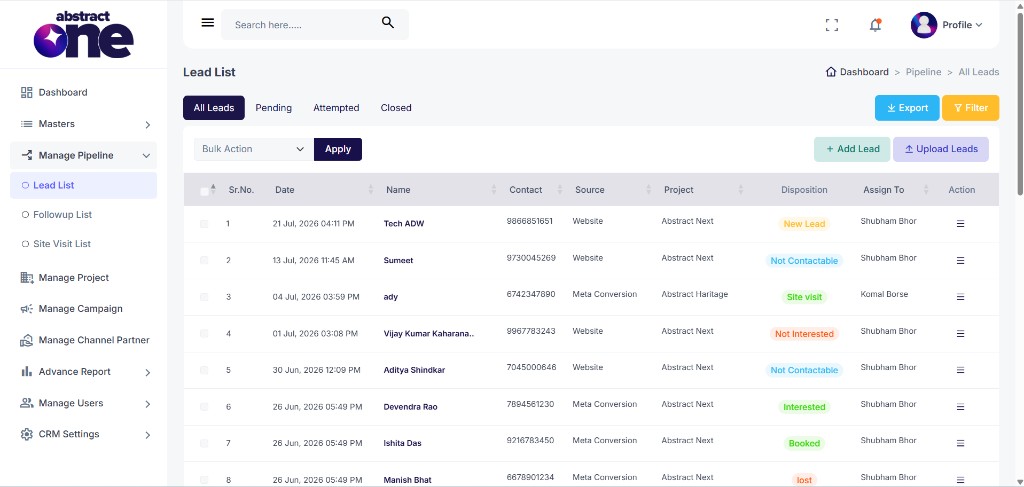
The Upload Leads wizard opens.
Step 1: Select Project & Campaign
The first step requires you to select a project and campaign for the uploaded leads.
| Field | Required | Description |
|---|---|---|
| Select Project | Yes | Choose the project all uploaded leads will be associated with |
| Select Campaign | Yes | Choose the campaign all uploaded leads will be associated with |
Both fields are mandatory. If you click Next without selecting both, an error message appears:
“Please select both Project and Campaign.”
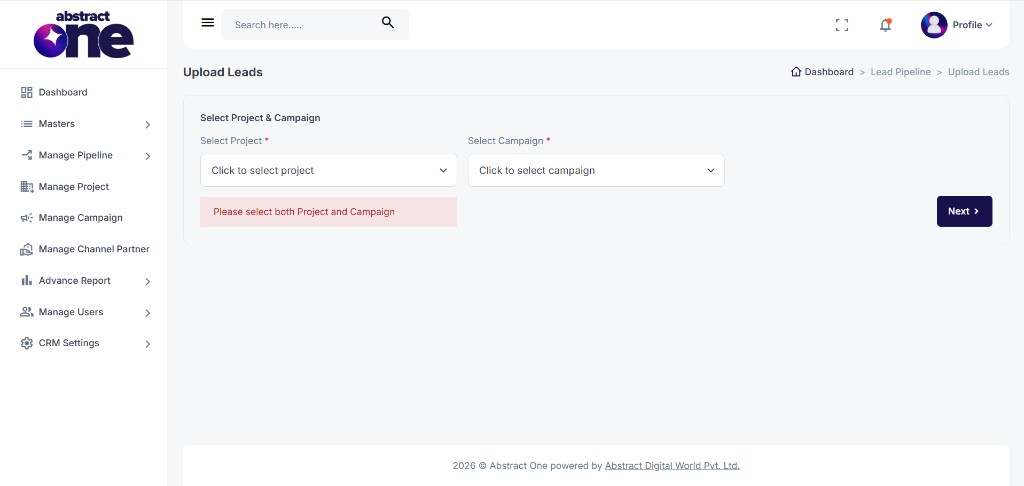
After selecting both fields, click Next > to proceed.
Step 2: Upload File
Upload your lead data file using the file upload area.
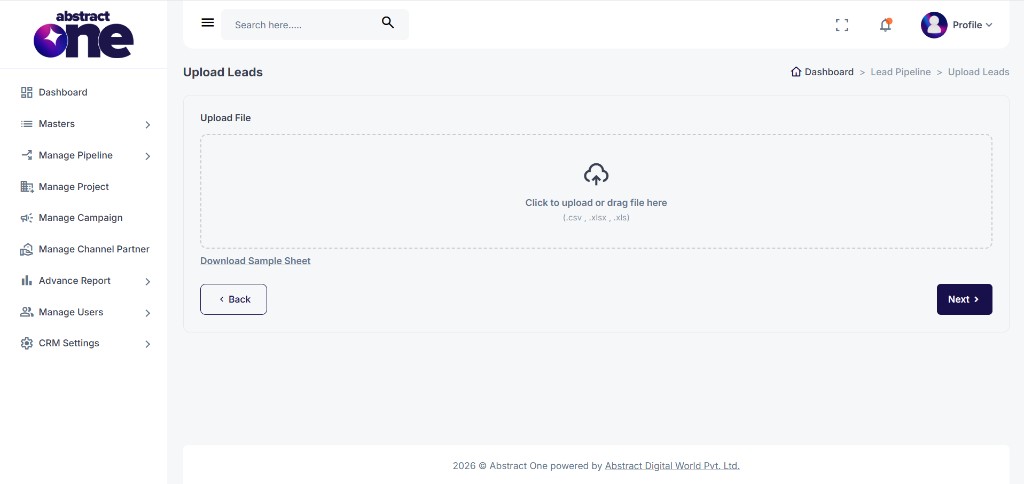
- Click to upload or drag and drop your file into the upload area.
- Supported formats: .csv, .xlsx, .xls
- Click Download Sample Sheet to get a template with the correct column format.
Once a file is attached, its name appears below the upload area.
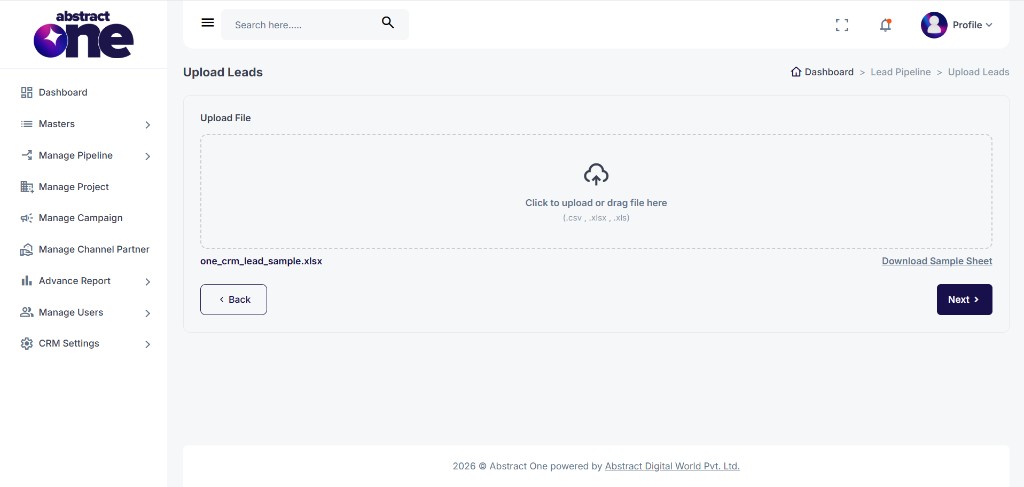
If you click Next without uploading a file, an error message appears:
“Please upload an Excel or CSV file.”
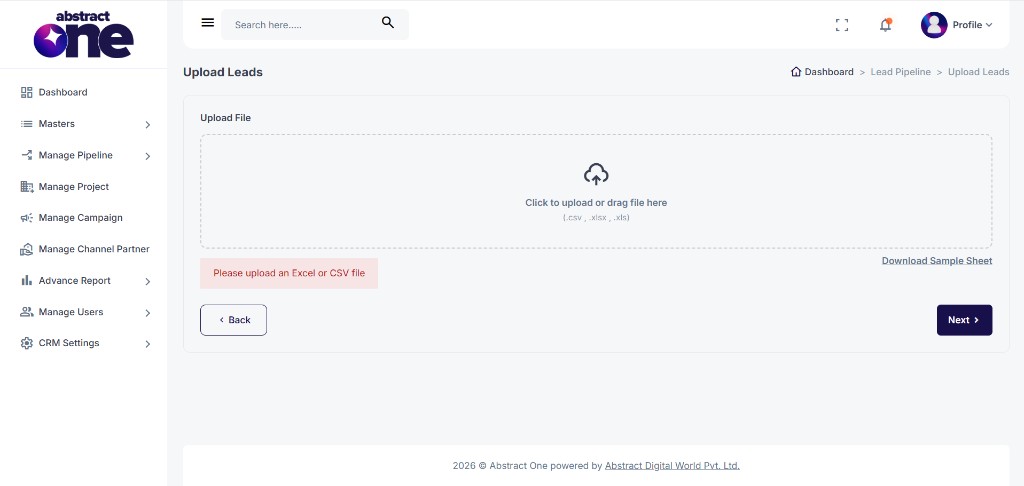
After attaching a valid file, click Next > to proceed to column mapping.
Step 3: Map Columns to CRM Fields
Map each column from your uploaded file to the corresponding CRM field using the dropdown menus.
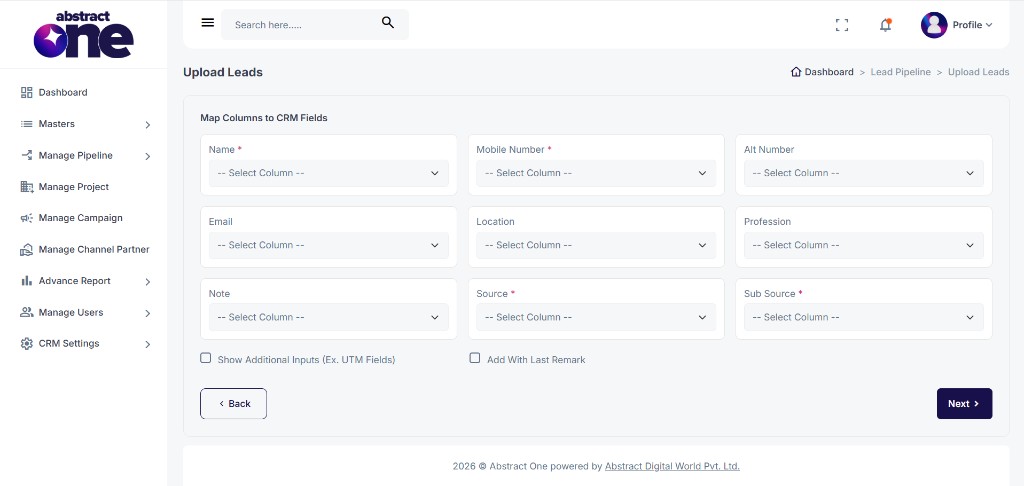
Required fields (marked with a red asterisk):
| CRM Field | Description |
|---|---|
| Name | Lead name column from the file |
| Mobile Number | Primary contact number column |
| Source | Lead source column |
| Sub Source | Sub source column |
Optional fields: Alt Number, Email, Location, Profession, Note.
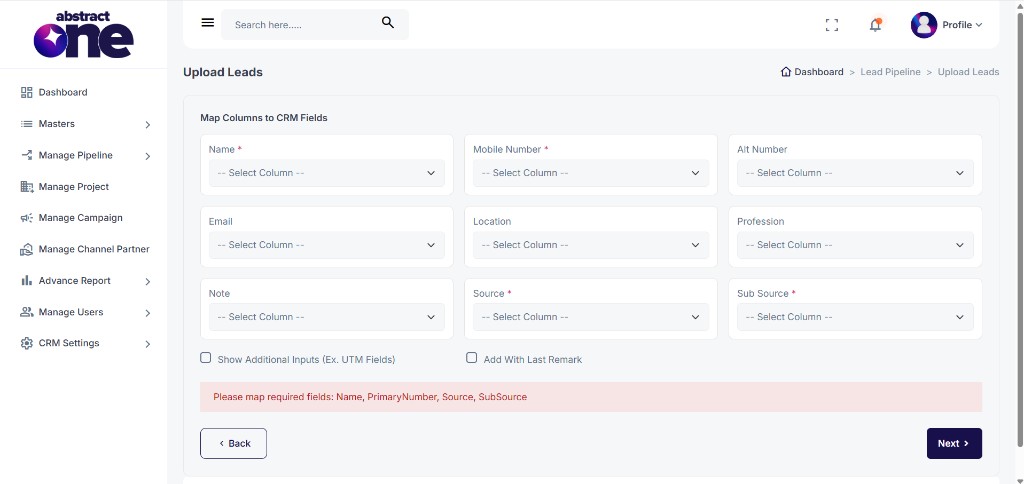
If required fields are not mapped, an error message appears:
“Please map required fields: Name, PrimaryNumber, Source, SubSource.”
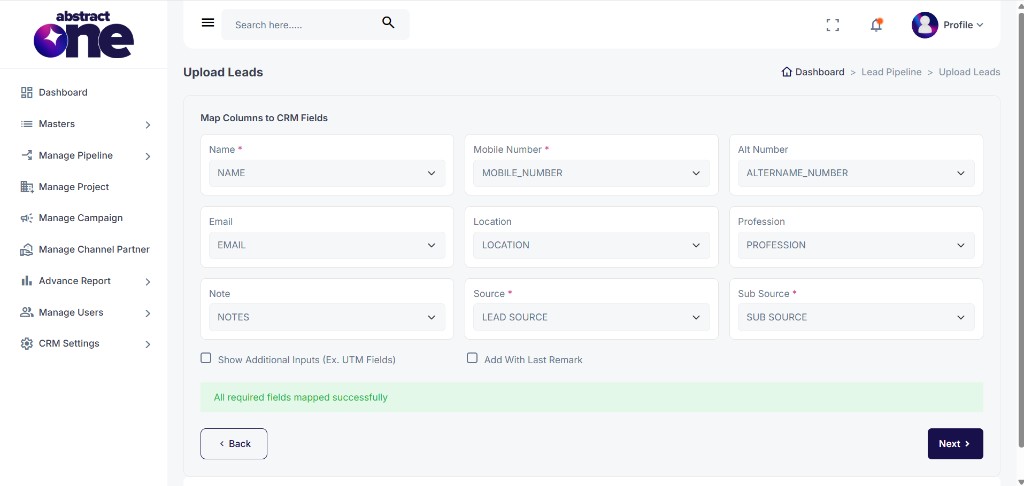
When all required fields are mapped correctly, a success message appears:
“All required fields mapped successfully.”
Additional Input Options
Two checkboxes are available below the mapping grid:
- Show Additional Inputs (Ex. UTM Fields) — Reveals extra mapping fields for UTM parameters, Meta campaign data, GCLID, FBCLID, Lead IP, and Lead Tag.
- Add With Last Remark — Includes the last remark from the file with each uploaded lead.
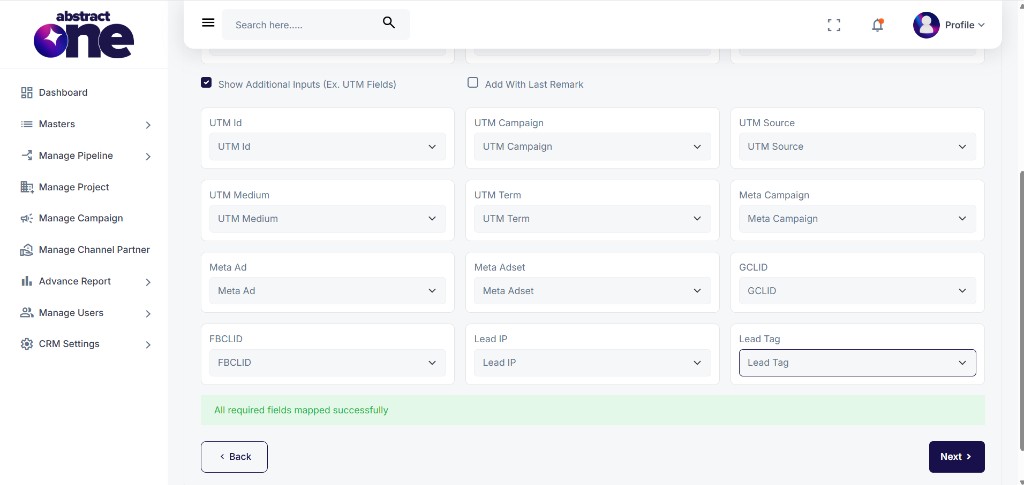
Available additional mapping fields: UTM Id, UTM Campaign, UTM Source, UTM Medium, UTM Term, Meta Campaign, Meta Ad, Meta Adset, GCLID, FBCLID, Lead IP, Lead Tag.
Click Next > to proceed to lead assignment.
Step 4: Assign Leads
Choose how the uploaded leads will be distributed among team members.
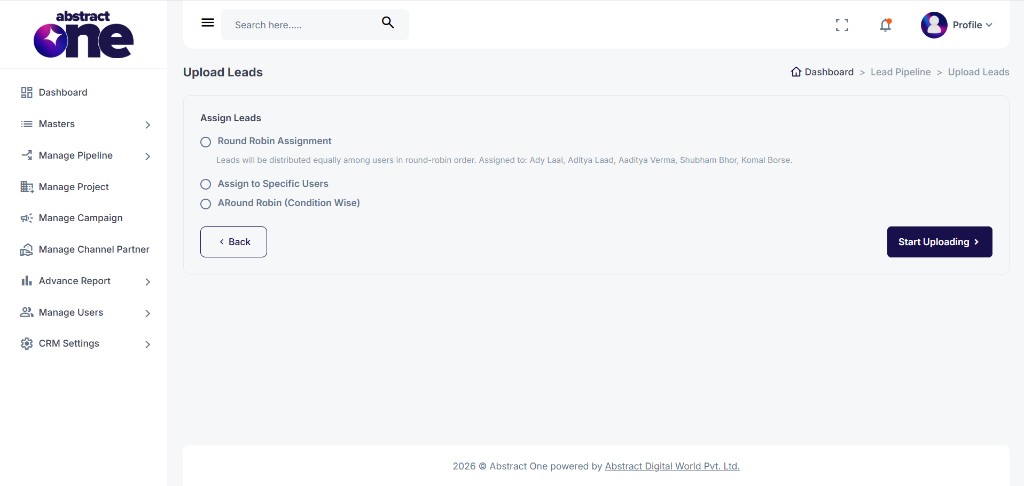
Three assignment options are available:
| Option | Description |
|---|---|
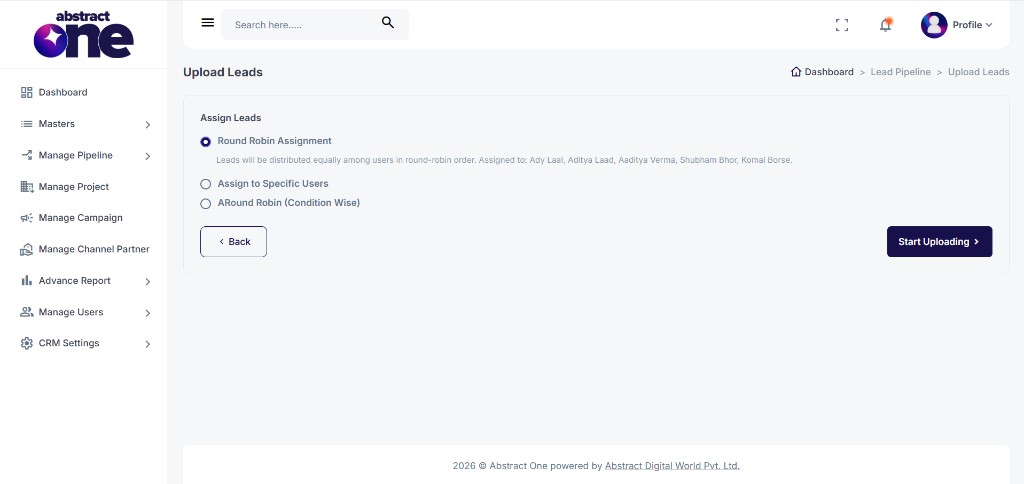
| Round Robin Assignment | Leads are distributed equally among users in round-robin order. The list of assigned users is displayed below the option. |
| Assign to Specific Users | Manually select which users receive the uploaded leads. |
| ARound Robin (Condition Wise) | Leads are distributed using round-robin logic based on specific conditions. |
When Round Robin Assignment is selected, the assigned users are listed (e.g. Ady Laal, Aditya Laad, Aaditya Verma, Shubham Bhor, Komal Borse).
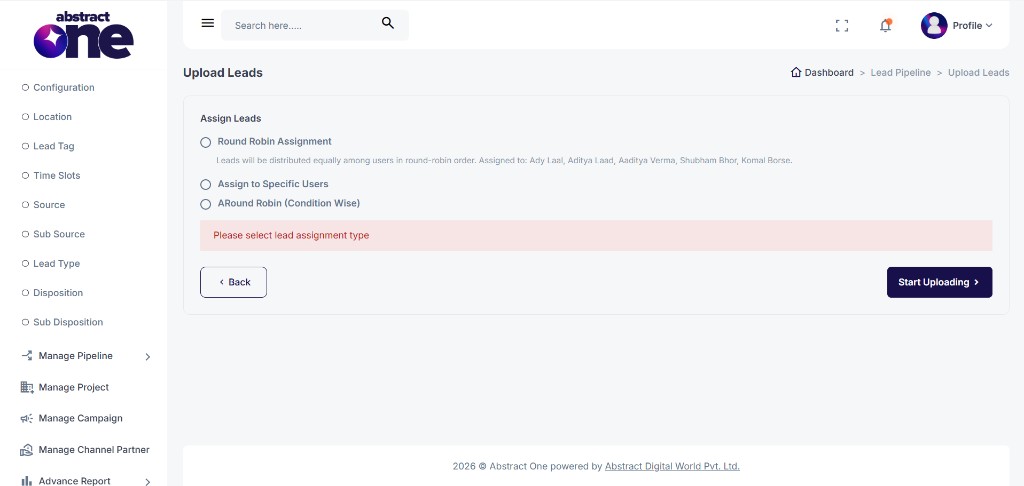
You must select an assignment type before proceeding. If none is selected, an error appears:
“Please select lead assignment type.”
After selecting an assignment method, click Start Uploading > to begin the import.
Step 5: Upload Results
Once the upload completes, a results summary is displayed showing the outcome of the import.
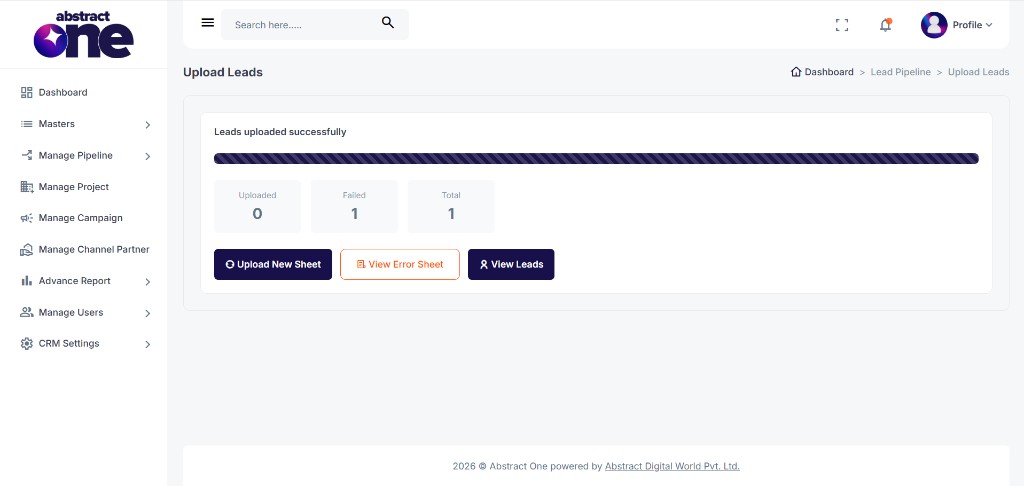
The results screen shows:
| Metric | Description |
|---|---|
| Uploaded | Number of leads successfully imported |
| Failed | Number of leads that failed to import |
| Total | Total number of leads in the uploaded file |
Three action buttons are available:
- Upload New Sheet — Start a new upload from the beginning
- View Error Sheet — Download a sheet showing which leads failed and why
- View Leads — Navigate to the Lead List to see the successfully uploaded leads
Important Notes
- Download the Sample Sheet before preparing your data to ensure correct column formatting.
- Only .csv, .xlsx, and .xls file formats are supported.
- Name, Mobile Number, Source, and Sub Source are mandatory mapping fields.
- All uploaded leads are associated with the project and campaign selected in Step 1.
- Use View Error Sheet to troubleshoot failed leads and re-upload corrected data.
- The upload wizard can be navigated back using the < Back button at any step.