Edit Project Details
The Edit Project flow allows you to update an existing project’s details in Abstract ONE. The edit process uses the same 6-step wizard as adding a project — the only difference is that all previously saved data is auto-fetched and pre-filled in the form fields.
You can update project name, developer, category, stage, USPs, location, configuration, amenities, location advantages, logo, and elevation image.
Access Edit Project
You can open the Edit Project wizard in two ways:
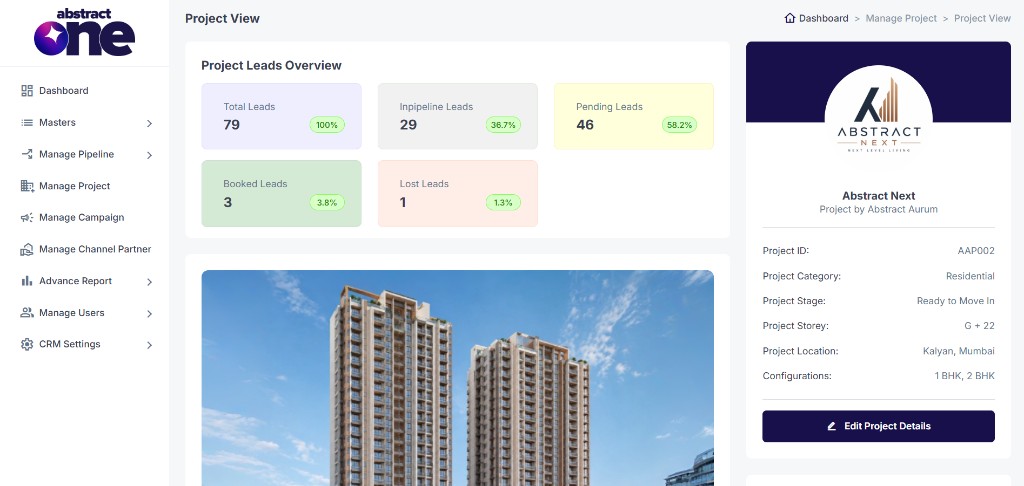
Option 1 — From Project View
Open the project details page and click Edit Project Details on the right panel.
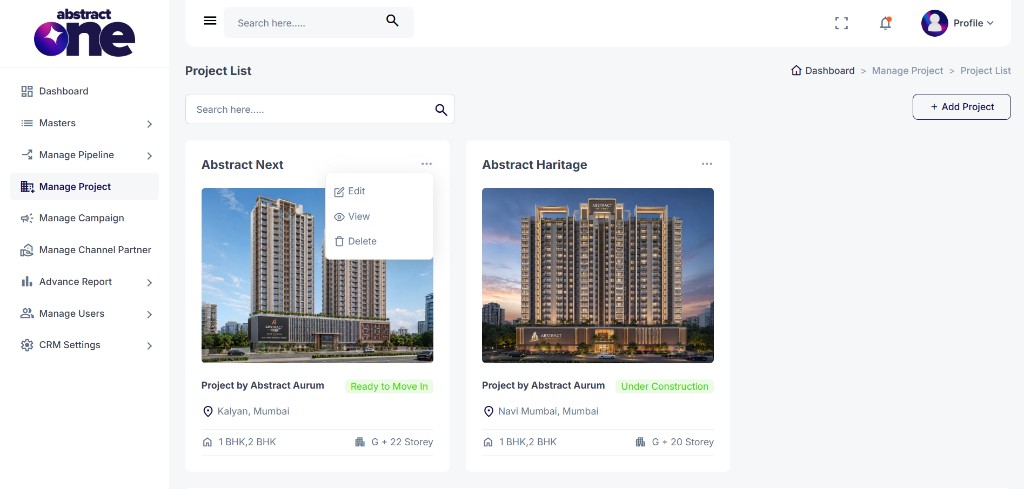
Option 2 — From Project List
On the Project List, click the three-dot menu on a project card and select Edit.
Step 1 — Basic Details
All existing project details are pre-filled. Update any field as needed. Fields marked with * are required.
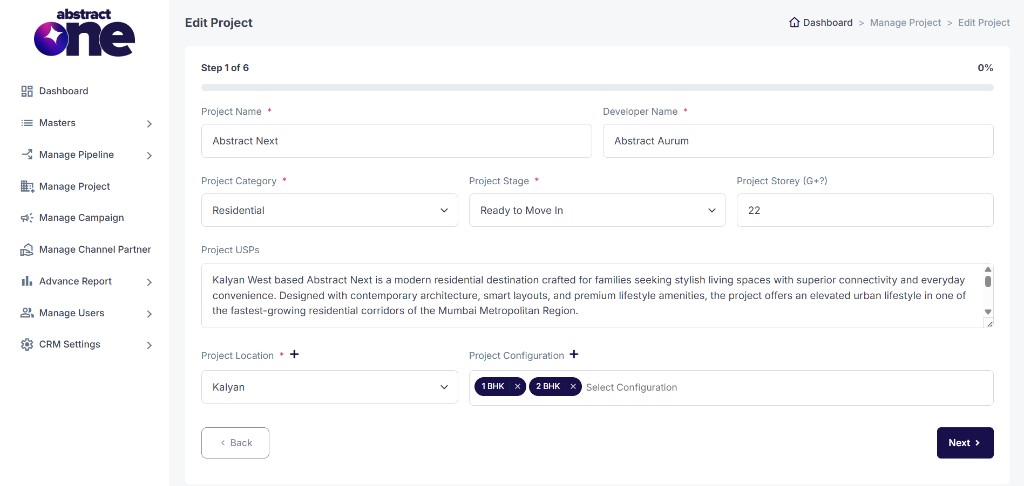
| Field | Required | Description |
|---|---|---|
| Project Name | Yes | Name of the project |
| Developer Name | Yes | Builder or developer name |
| Project Category | Yes | Project type (e.g. Residential, Commercial) |
| Project Stage | Yes | Current stage (e.g. Under Construction, Ready to Move In) |
| Project Storey (G+?) | No | Number of floors (e.g. 22) |
| Project USPs | No | Unique selling points of the project |
| Project Location | Yes | Location from the master list. Use the + icon to add a new location. |
| Project Configuration | No | Unit types (e.g. 1 BHK, 2 BHK). Use the + icon to add a new configuration. |
If any required field is missing, the form will not move to the next step and will show an error on that input.
Click Next > to continue.
Step 2 — Amenities
Previously added amenities appear as tags. This step is optional — you can add new amenities, remove existing ones, or leave it unchanged.
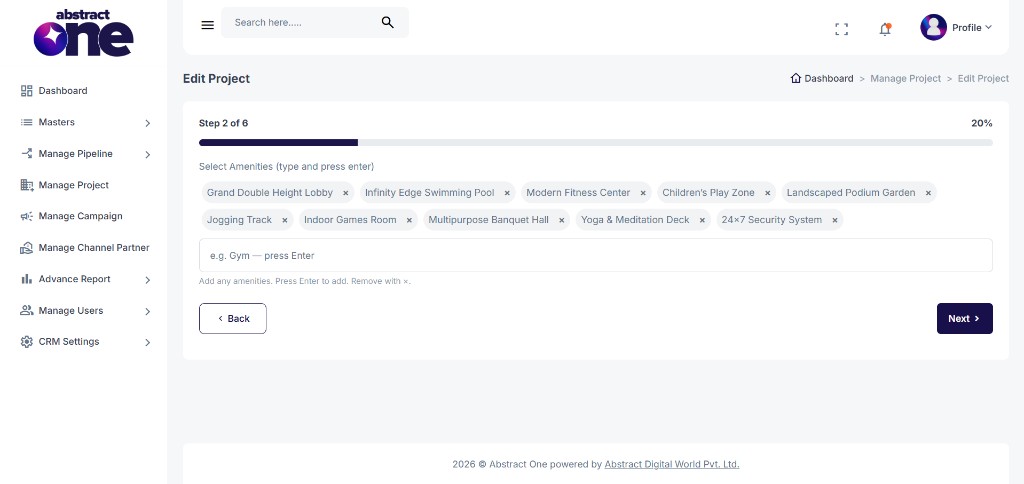
Type an amenity name and press Enter to add it. Remove any item using the x on the tag.
If the same amenity is added twice, the system displays:
“[name]” is already added.
Click Next > to continue.
Step 3 — Location Advantages
Previously saved location advantages are pre-filled under four categories. All fields are optional.
- Connectivity
- Education Hubs
- Hospitals
- Shopping & Entertainment
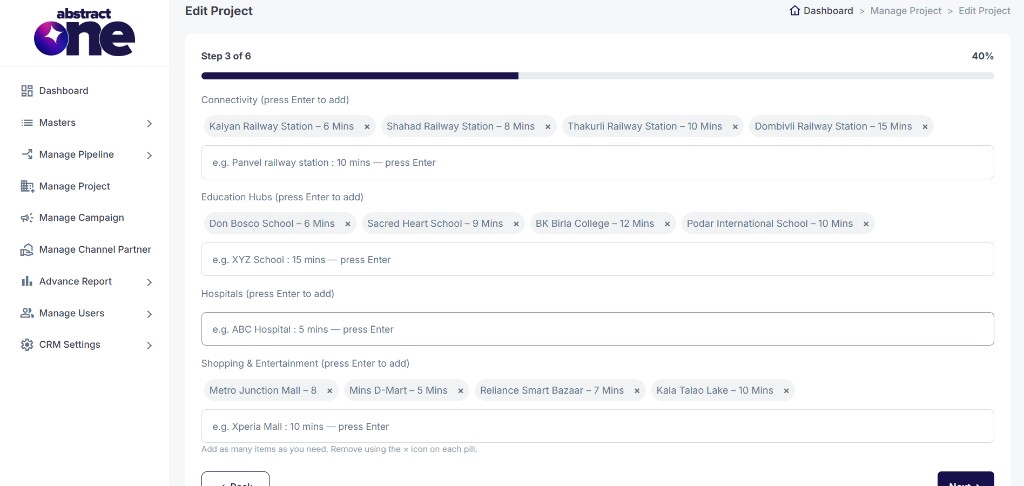
Type the detail and press Enter to add. Remove any item using the x on the tag.
Duplicate entries are not allowed. The system displays:
“[name]” is already added.
Click Next > to continue.
Step 4 — Media Upload
The existing project logo and elevation image are displayed with previews. You can keep the current files or upload new ones. Both fields are required.
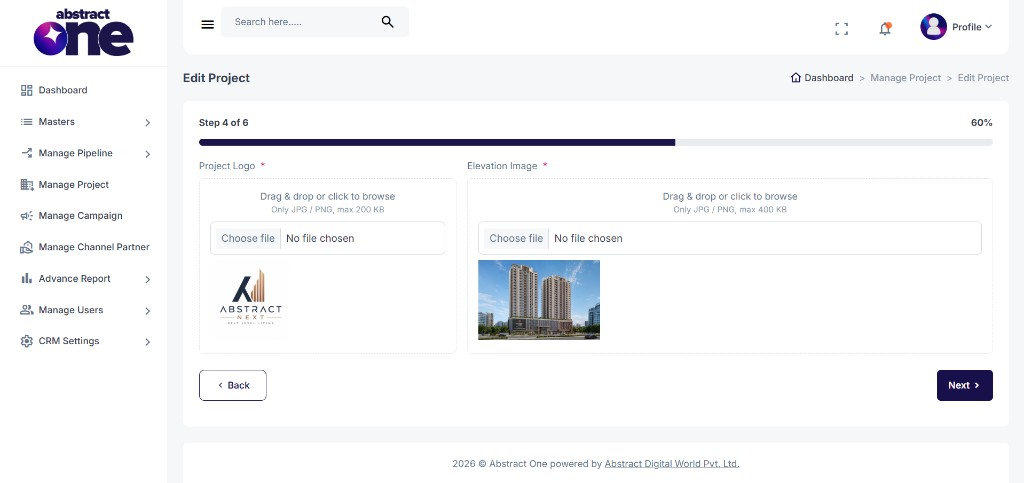
| Field | Format | Max Size |
|---|---|---|
| Project Logo | JPG / PNG | 200 KB |
| Elevation Image | JPG / PNG | 400 KB |
Drag and drop a file or click to browse. A preview appears after a new file is selected.
Click Next > to continue.
Step 5 — Review and Submit
Review all updated data across Basic Details, Amenities, Nearby Advantages, and Media.
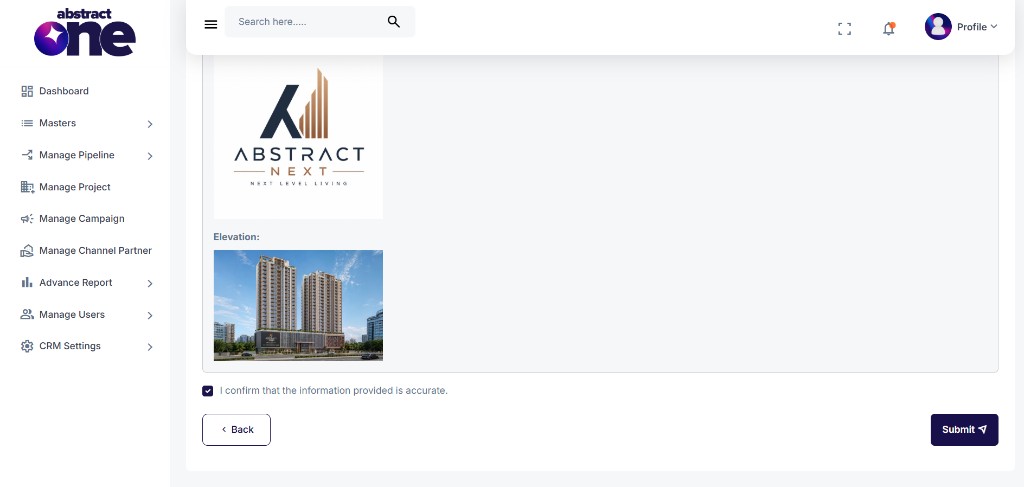
Check I confirm that the information provided is accurate, then click Submit.
Use Back to return to any previous step and make changes.
Step 6 — Project Updated
After submission, the system saves the updated project data. On success, the following screen appears:
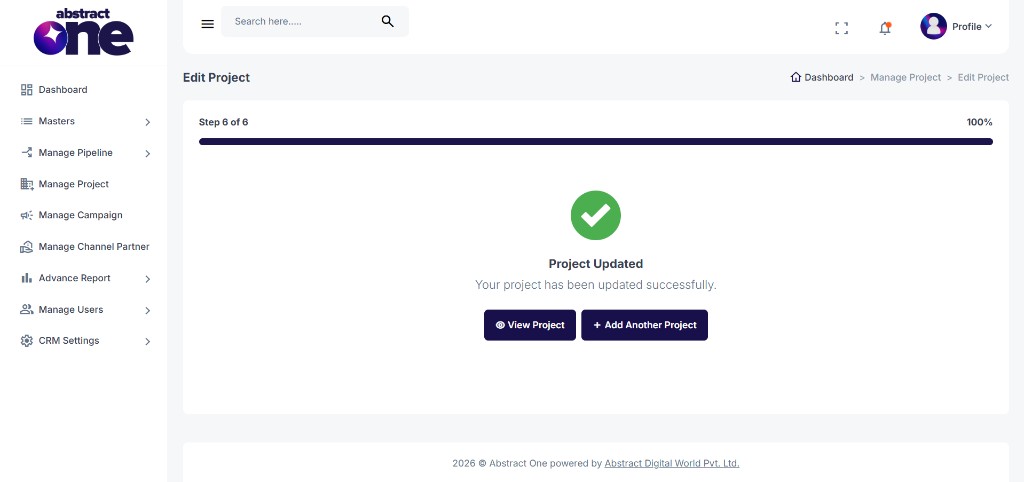
From here, you can:
- View Project — open the updated project details page
- + Add Another Project — start a new project
Important Notes
- All previously saved project data is auto-fetched and pre-filled when the edit wizard opens.
- Updated details are reflected on the Project List cards and the Project View page.
- Project Location and Project Configuration values come from the Masters module. Use the + icon on the form to add new values.
- Amenities and Location Advantages are optional but help present complete project information.
- Logo and Elevation Image must meet the file format and size limits if you upload new files.
- The Project ID does not change when editing a project.