
Add Roles & Permission
Manage user roles and define access permissions across the CRM. Assign role-based privileges to control which modules, features, and actions each user can view, create, edit, delete, or manage, ensuring secure and organized access control.
Default Role Authority
The CRM includes the following predefined roles. These are system-defined roles and their role names cannot be modified or deleted.
| Sr. No. | Default Role | Primary Responsibility | Editable | Deletable |
| 1 | Sourcing Manager | Manages lead sourcing activities and source performance. | ❌ No | ❌ No |
| 2 | Pre Sales | Handles lead qualification, follow-ups, and customer interactions before site visits. | ❌ No | ❌ No |
| 3 | Site Head | Manages site visits, site teams, and customer site experience. | ❌ No | ❌ No |
| 4 | Closing Manager | Handles booking confirmations, negotiations, and sales closures. | ❌ No | ❌ No |
| 5 | Sales Head | Oversees the complete sales team, performance, and revenue targets. | ❌ No | ❌ No |
Access Add Roles
Go to:
Sidebar → Manage Users → Roles
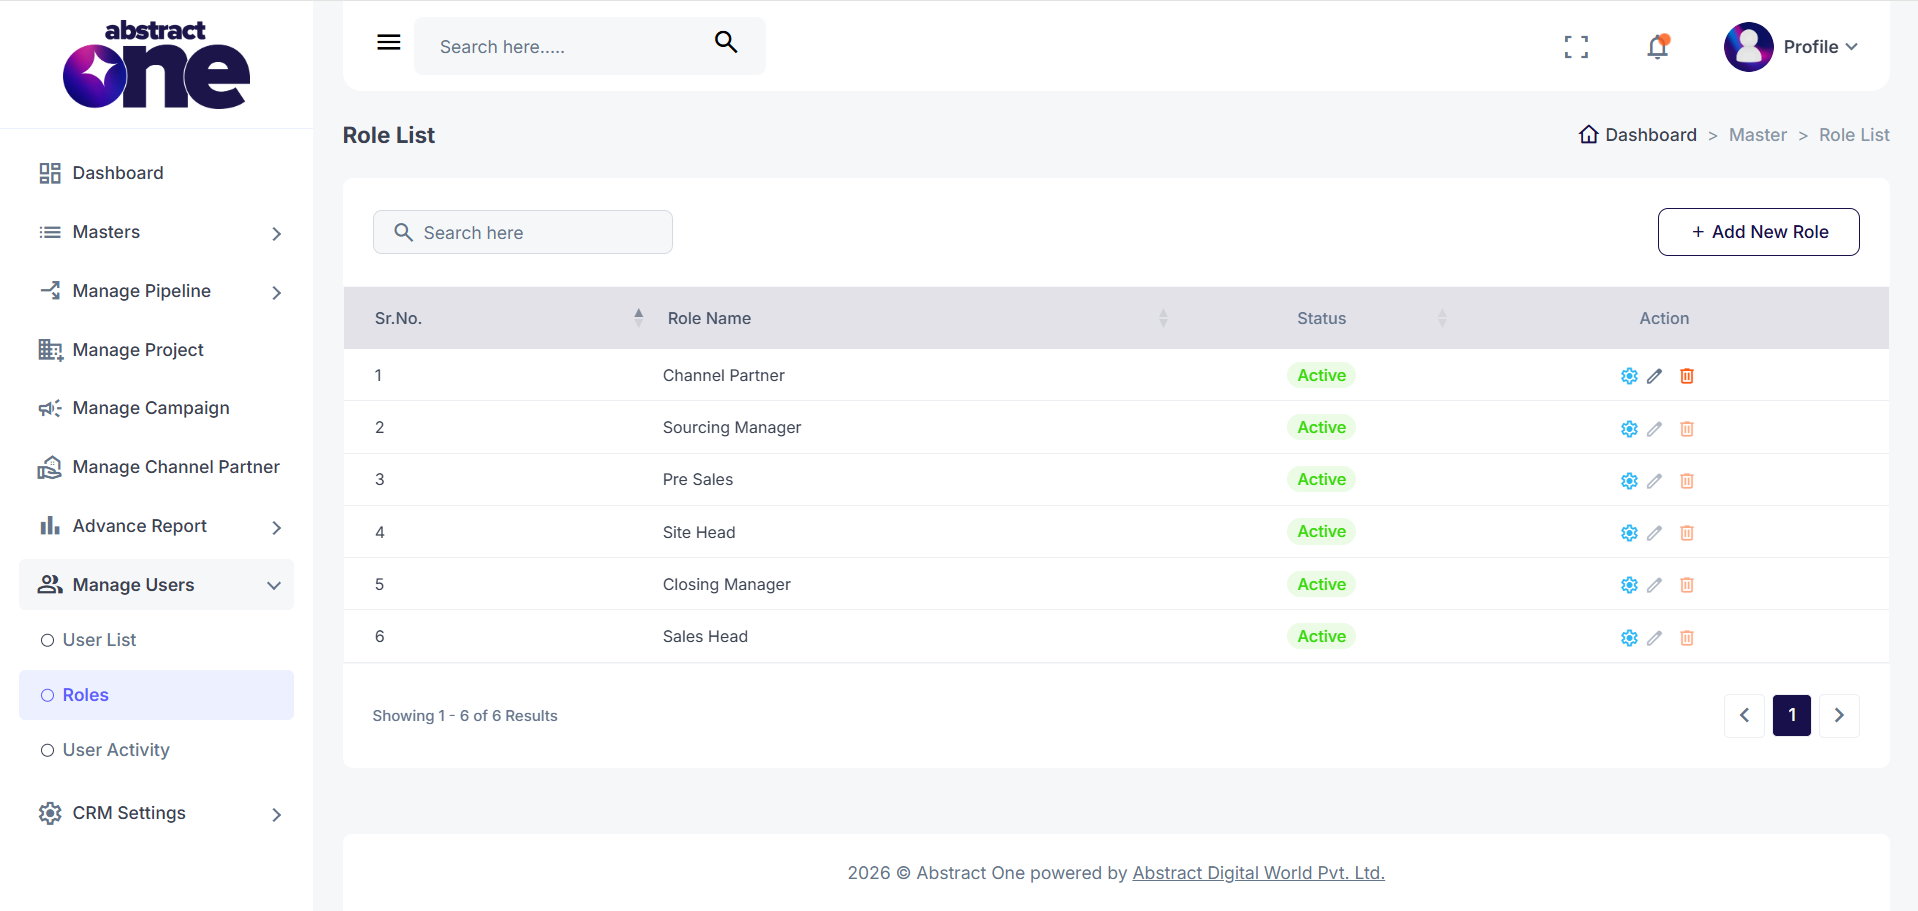
On the Roles page, click + Add New Roles on the top right. The Add Roles drawer opens.
Case 1: Add a Roles
To create a new Role:
Step 1 — Open Add Role
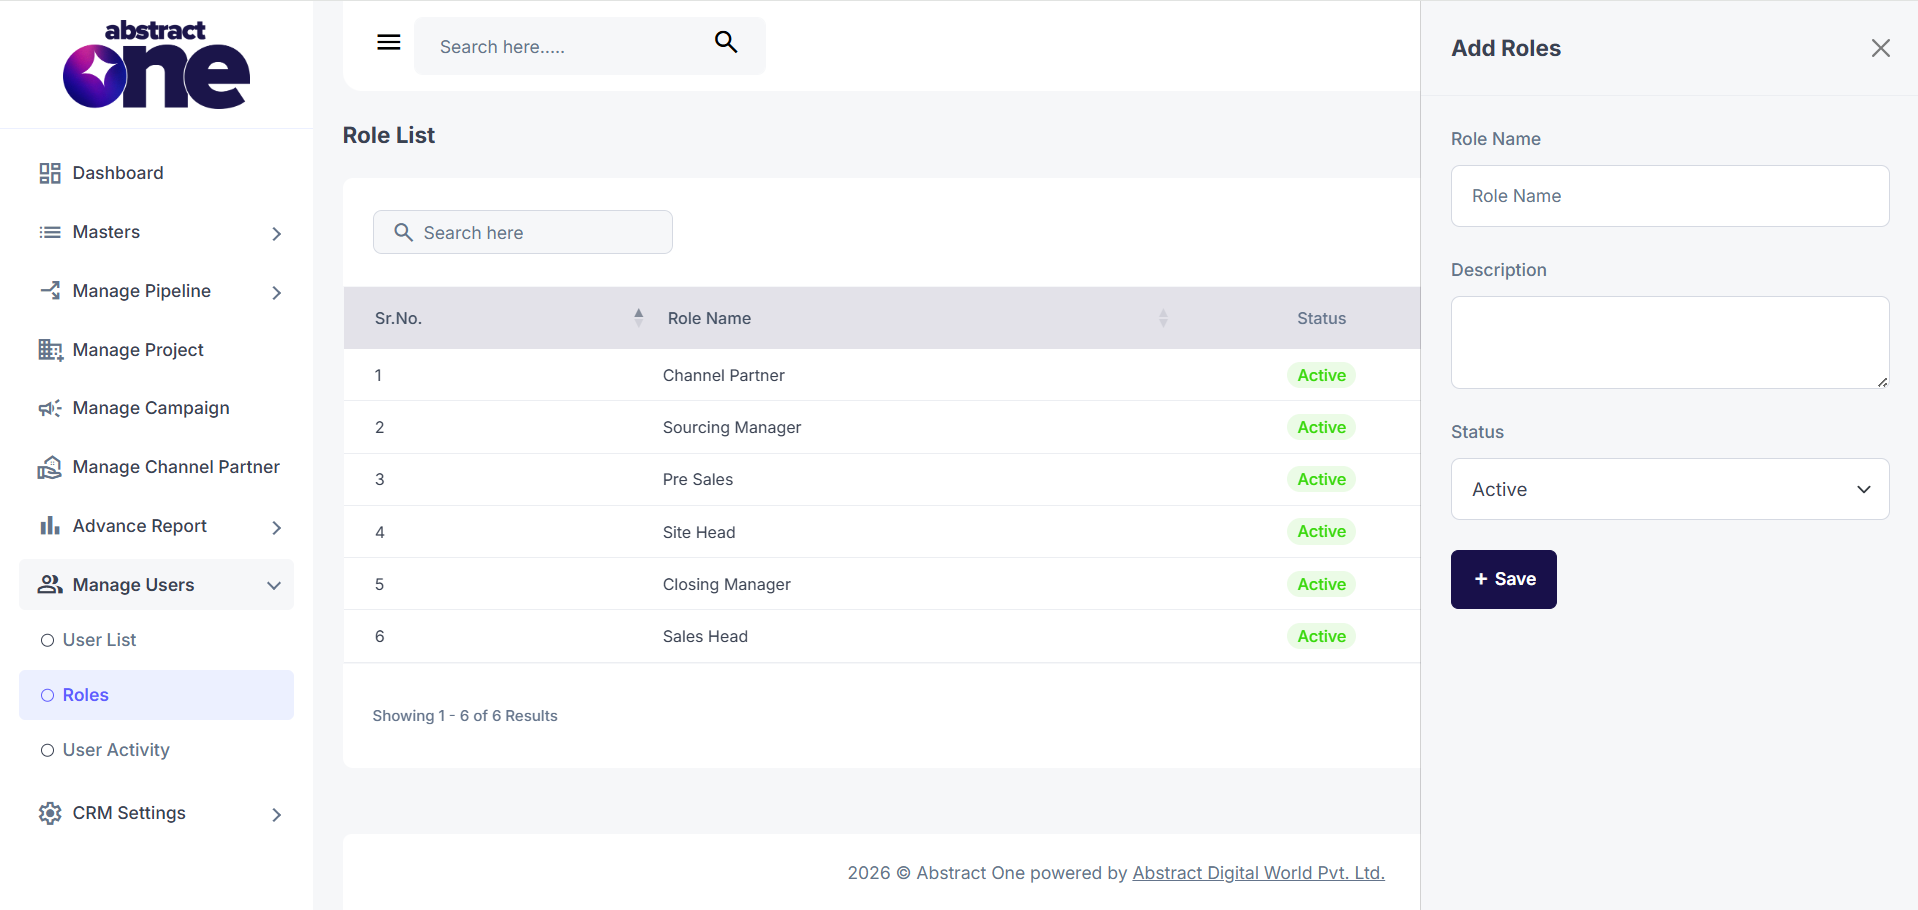
Click + Add New Role. The Add Role drawer opens on the right side.
Step 2 — Fill and Save
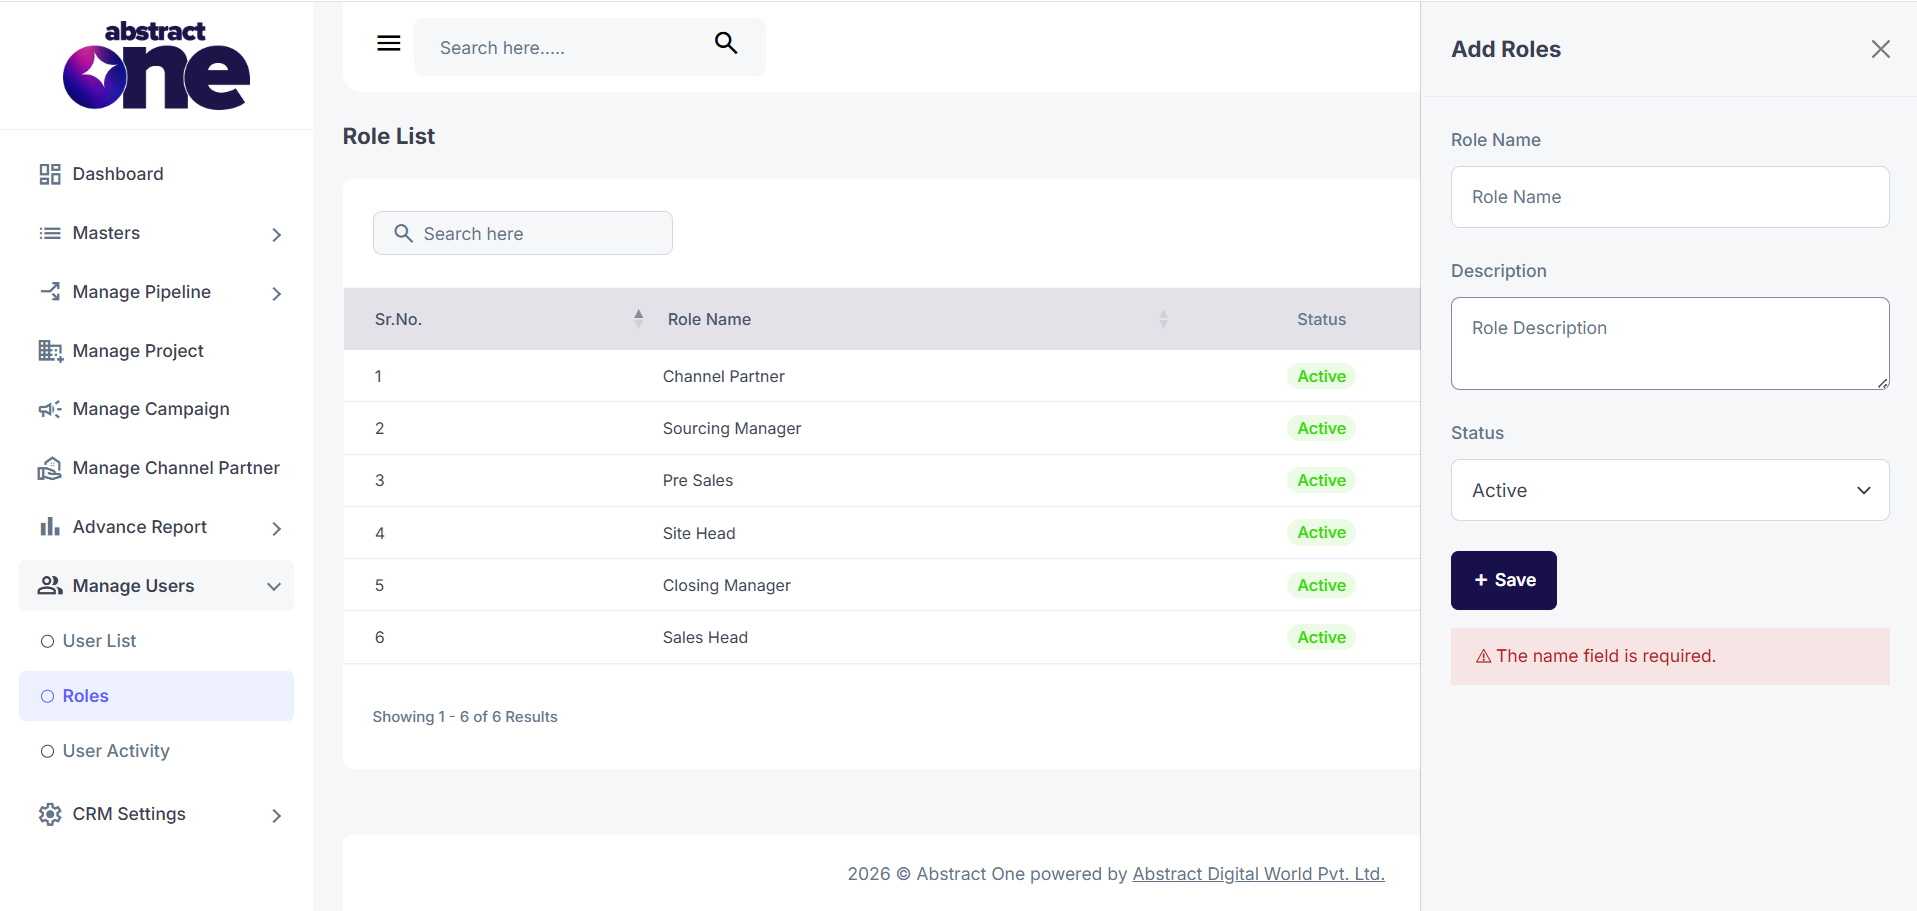
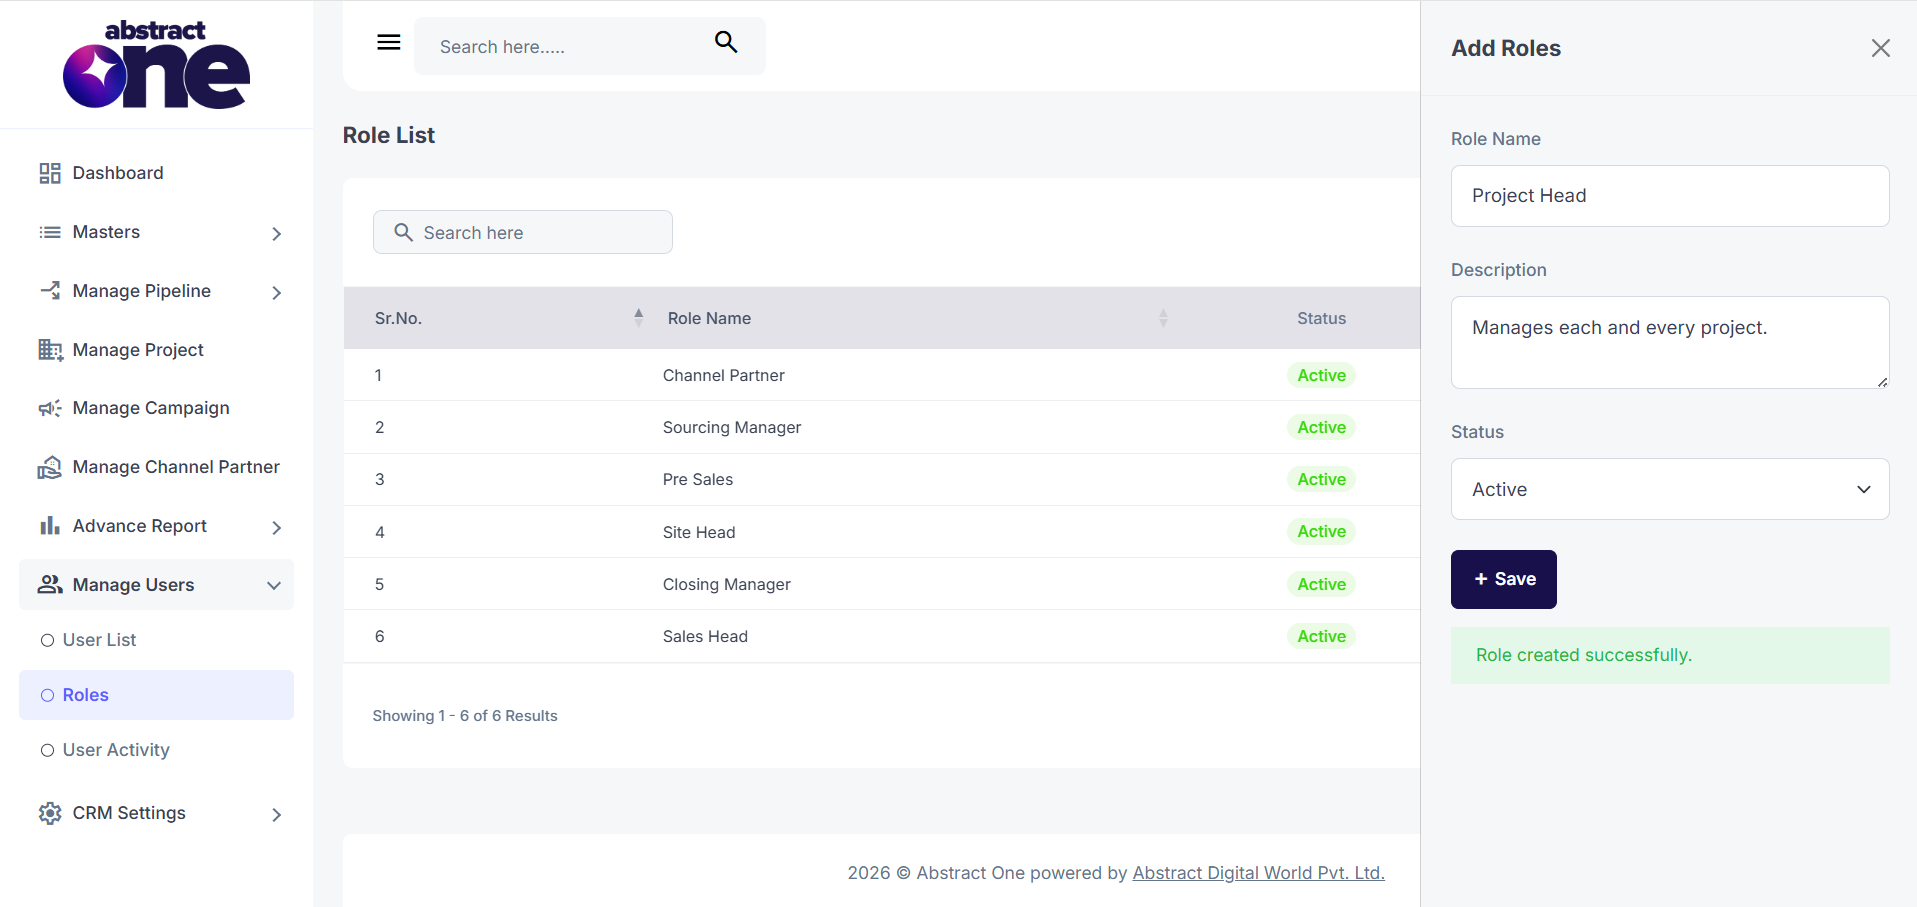
Enter all required details and click + Save. Role name is mandatory to add roles.
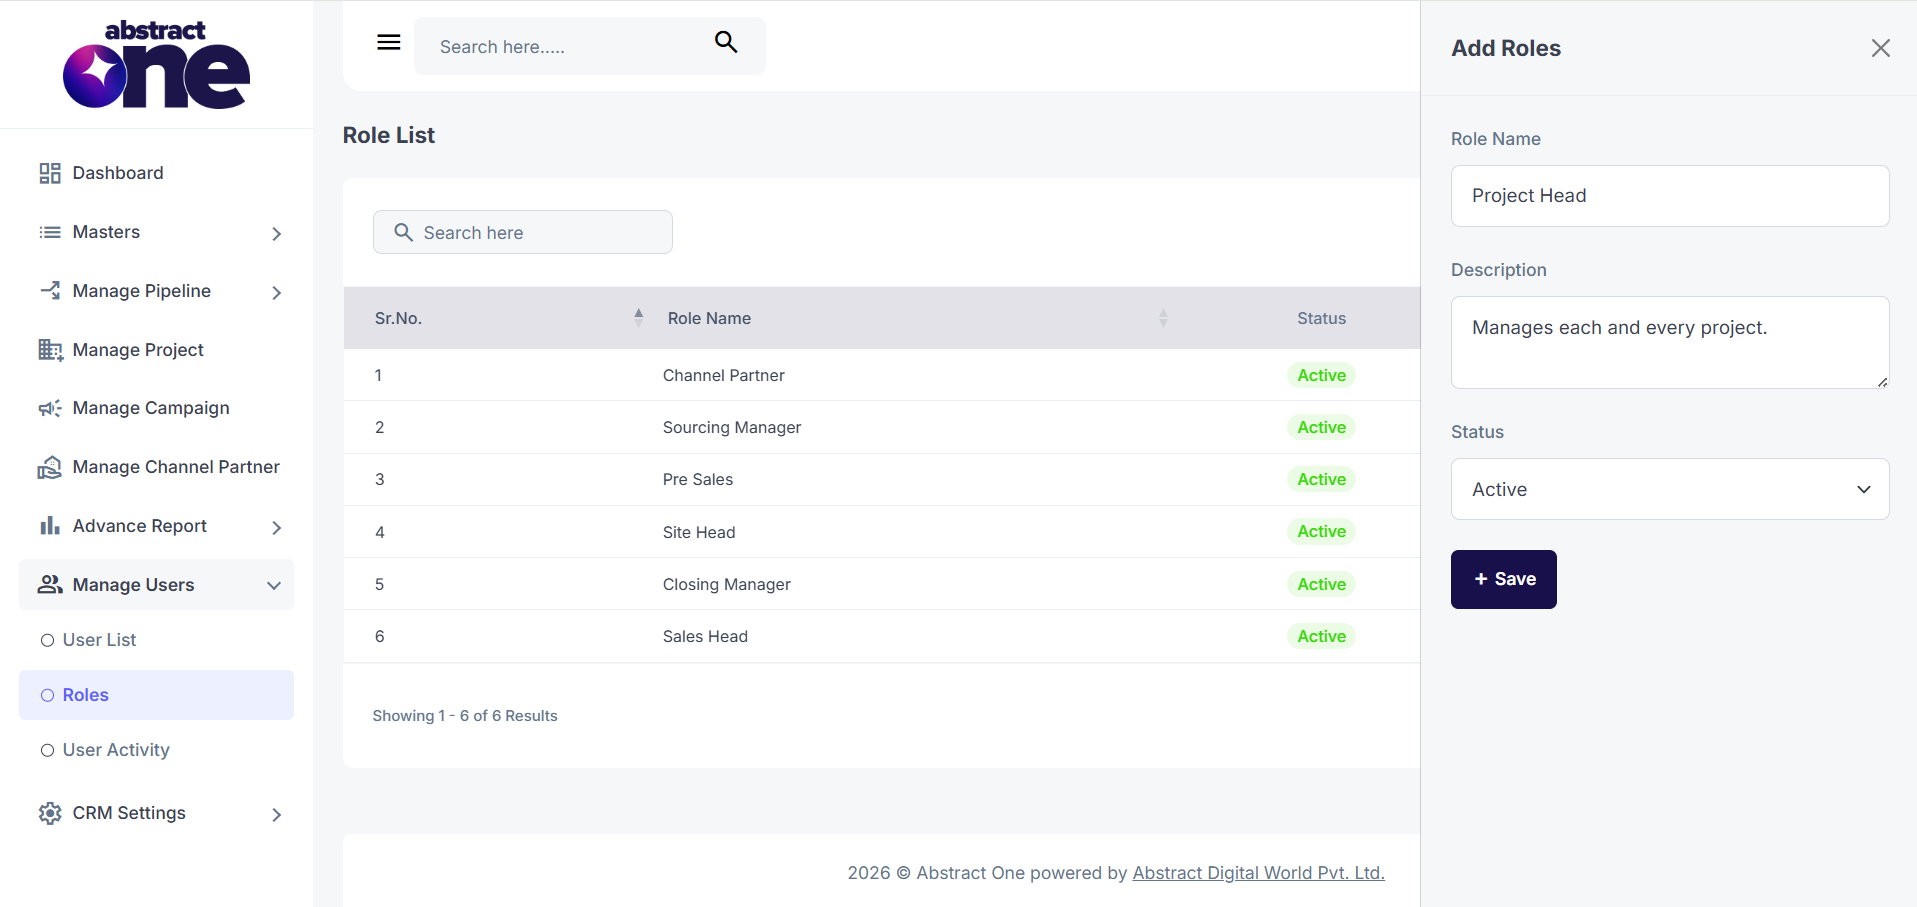
| Field | Required | Description |
| Role | Yes | User role |
| Description | No | About the role |
| Status | Yes | Set as Active or Inactive |
If any required field is left empty, the system displays:
Please fill all fields.
On success, the system displays:
Role created successfully.
After Role Is Created
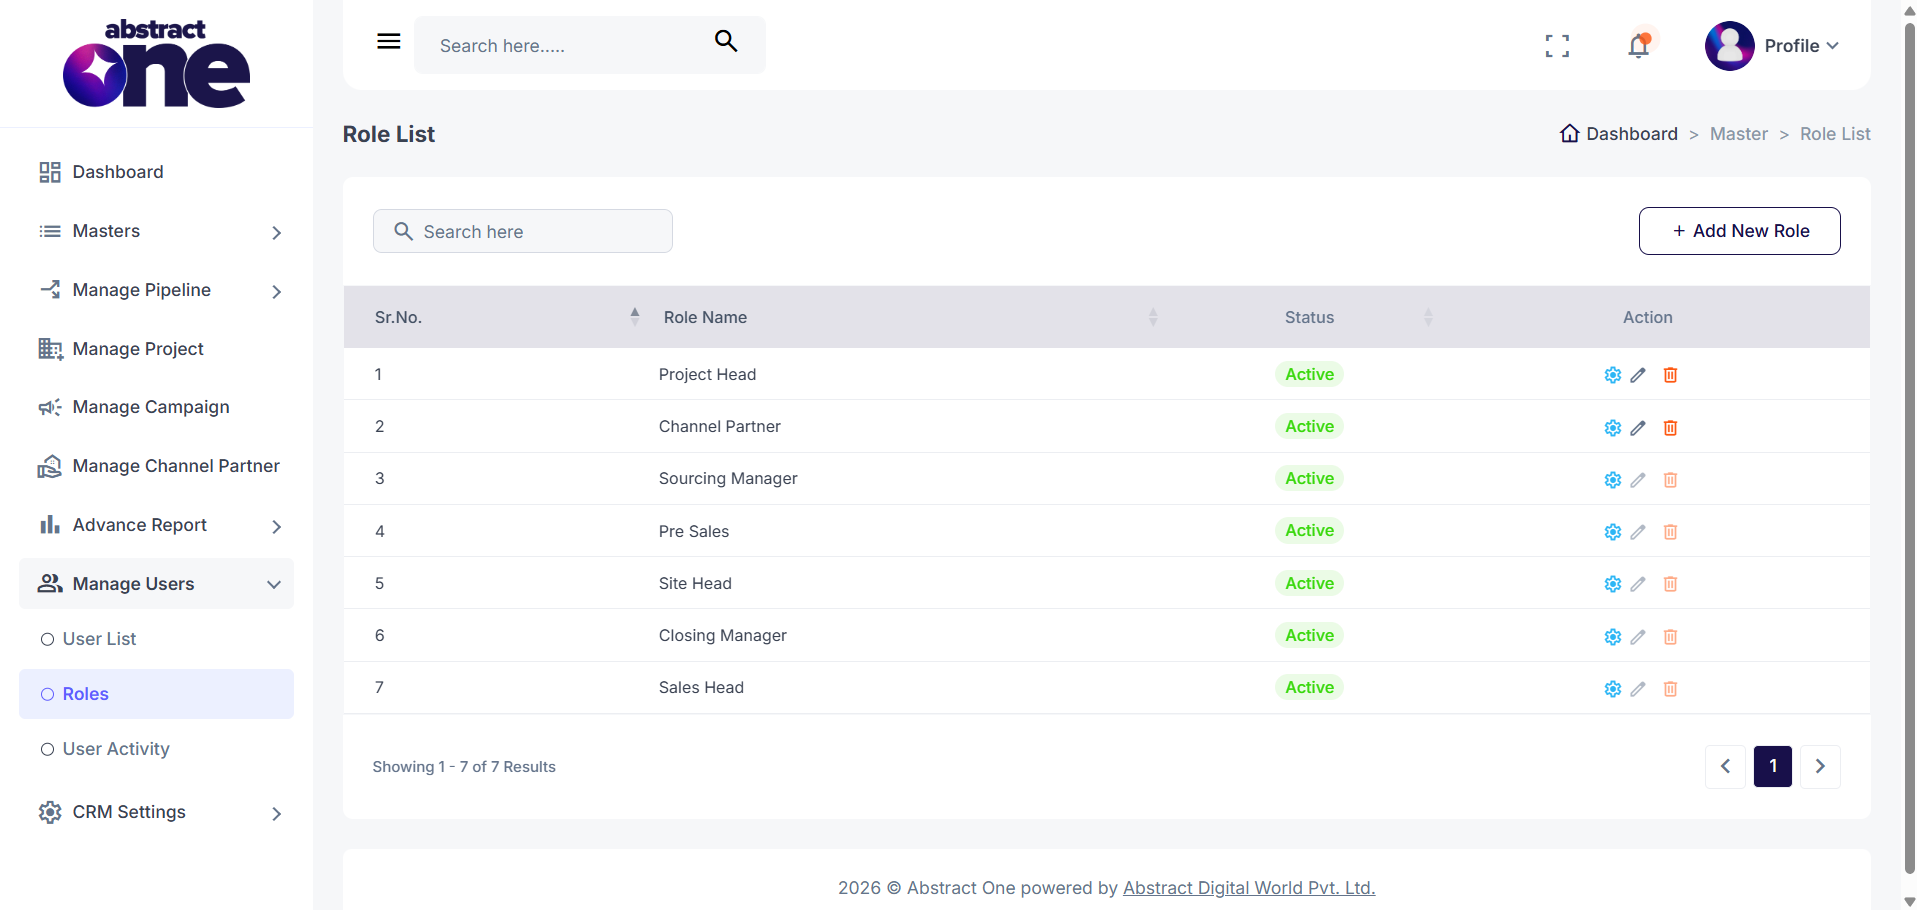
Once a role is created, it appears in the Role List. The list displays the Role Name, Status (Active/Inactive), and Actions. From the Actions column, you can configure role permissions through Settings, Edit the role details, or Delete the role if it is no longer required.
Case 2: Manage Access
To manage access:
Manage Access Permissions
To manage role access, click the Settings icon in the Actions column. This will open the Access Permissions page, where you can configure module and feature permissions for the selected role.
Manage Permissions
Configure module-wise permissions for the selected role by enabling or disabling access to specific features and actions within the CRM.
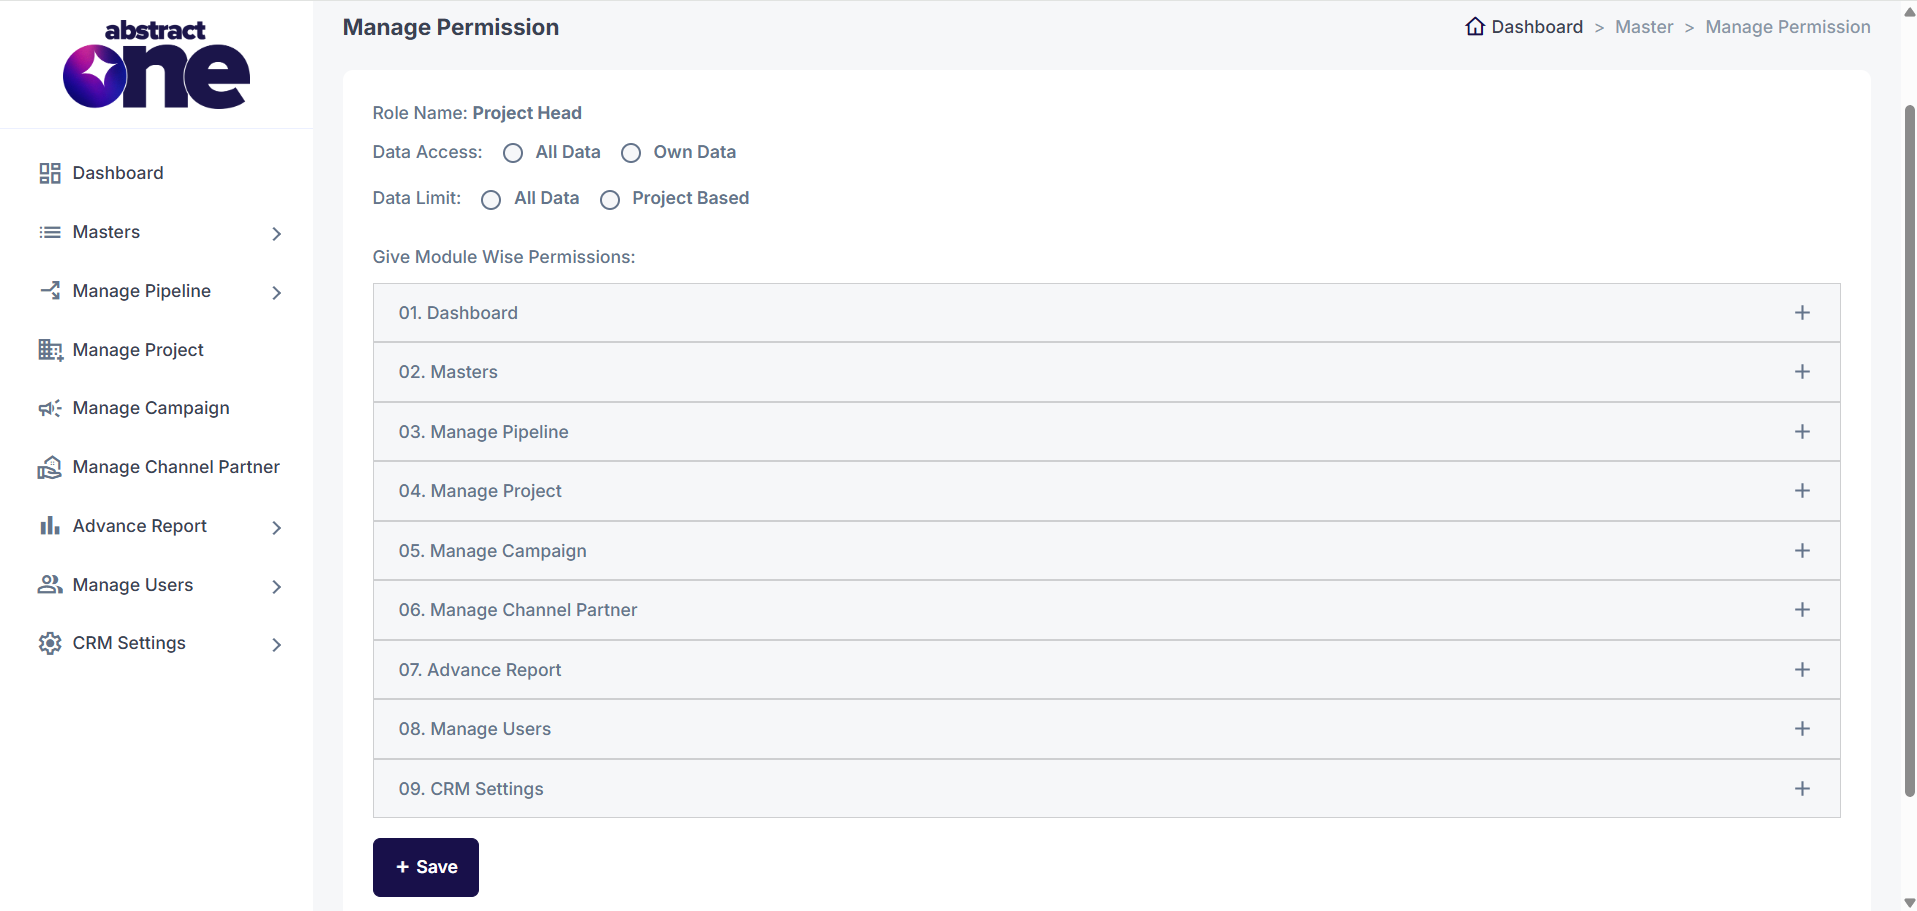
The Manage Permissions page allows administrators to define role-based access for the selected role.
- Role Name: Displays the name of the selected role (e.g., Project Head).
- Data Access: Controls the scope of records the role can access.
- All Data: Allows access to all records in the CRM.
- Own Data: Restricts access to records assigned to or created by the user.
- Data Limit: Defines the data visibility based on projects.
- All Data: Provides access to data across all projects.
- Project Based: Restricts access to data related to assigned projects only.
Module-wise Permissions
Expand the required module to configure its permissions. You can enable or disable access for each module based on the responsibilities of the selected role.
The available modules are:
- Dashboard
- Masters
- Manage Pipeline
- Manage Project
- Manage Campaign
- Manage Channel Partner
- Advance Report
- Manage Users
- CRM Settings
After assigning the required permissions, click the Save button to apply the changes for the selected role.
Dashboard Module Permissions
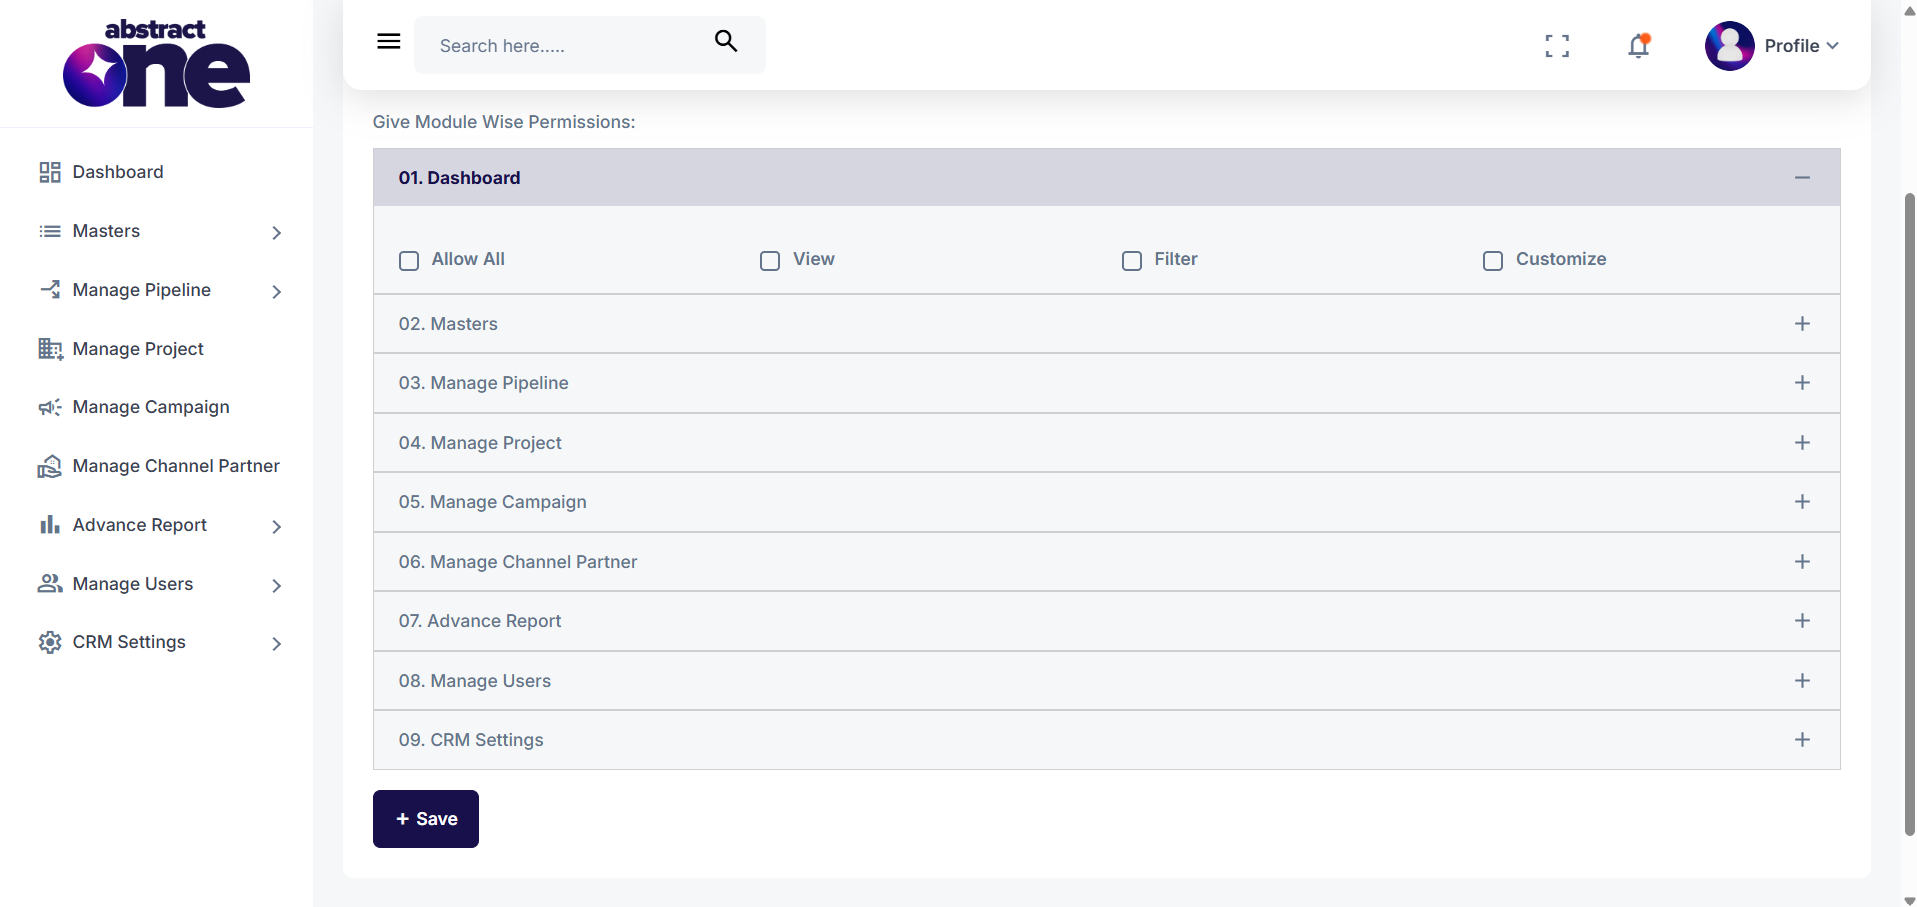
Expand the Dashboard module to configure access permissions for the selected role. The available permissions are:
- Allow All: Grants all available permissions for the Dashboard module with a single selection.
- View: Allows the user to access and view the Dashboard.
- Filter: Enables the user to apply filters and customize dashboard data based on available criteria.
- Customize: Allows the user to personalize dashboard widgets, layouts, or display settings.
After selecting the required permissions, click Save to apply the changes to the selected role.
Masters Module Permissions
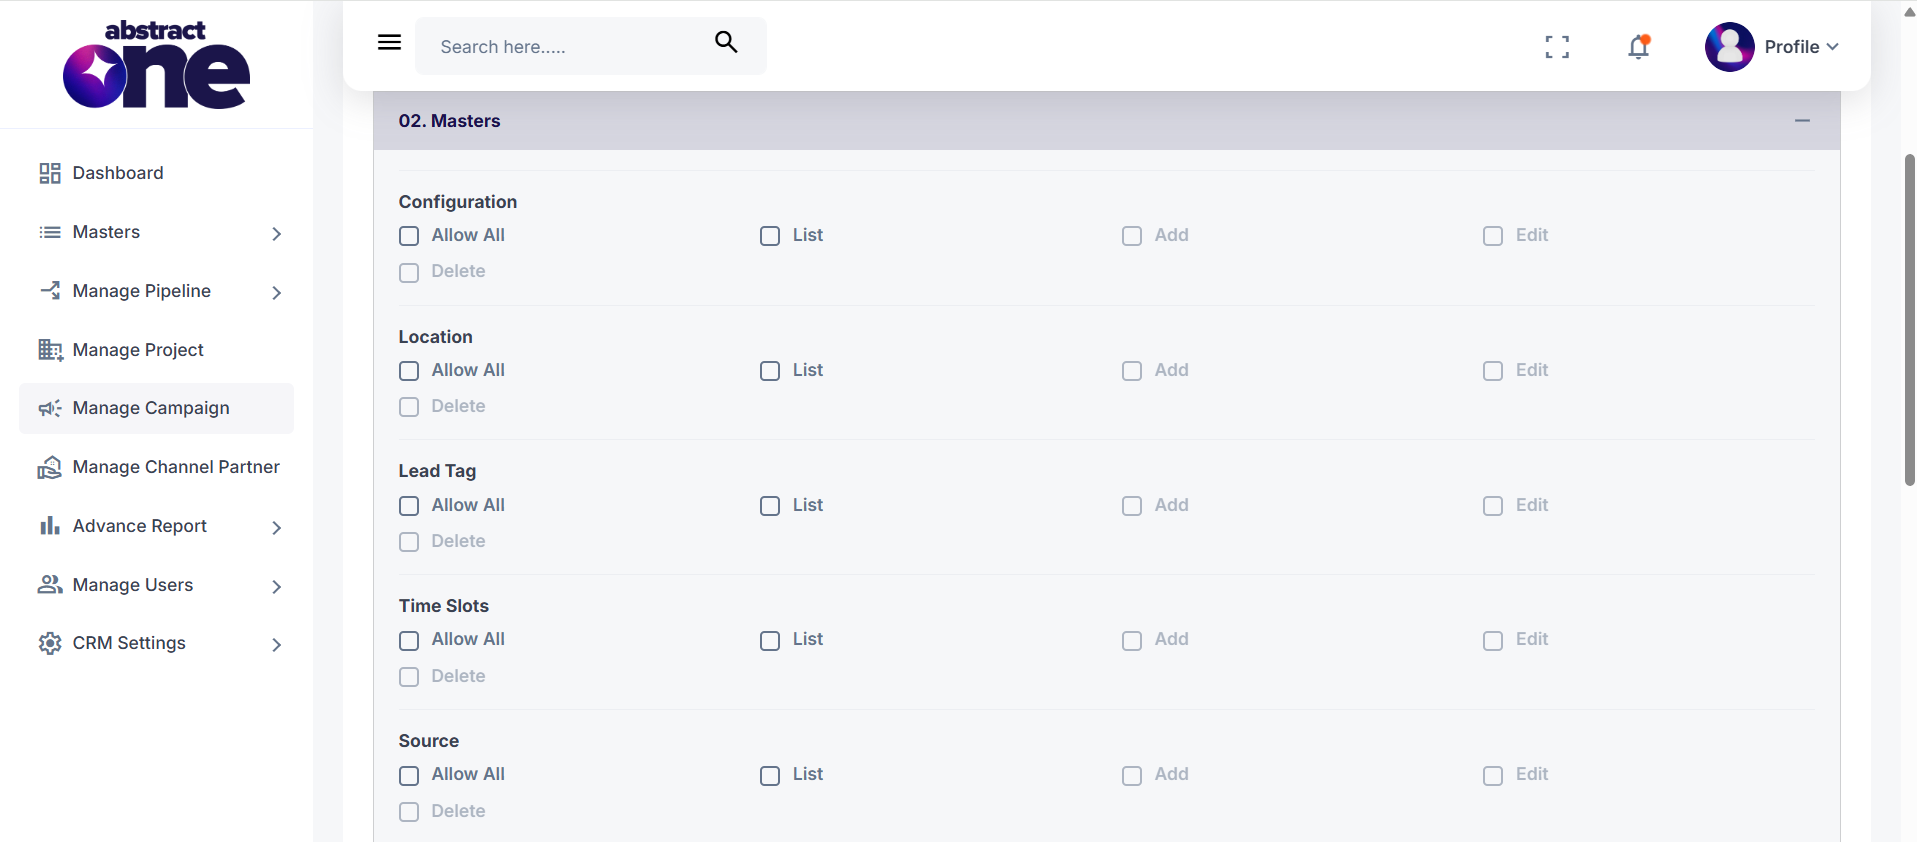
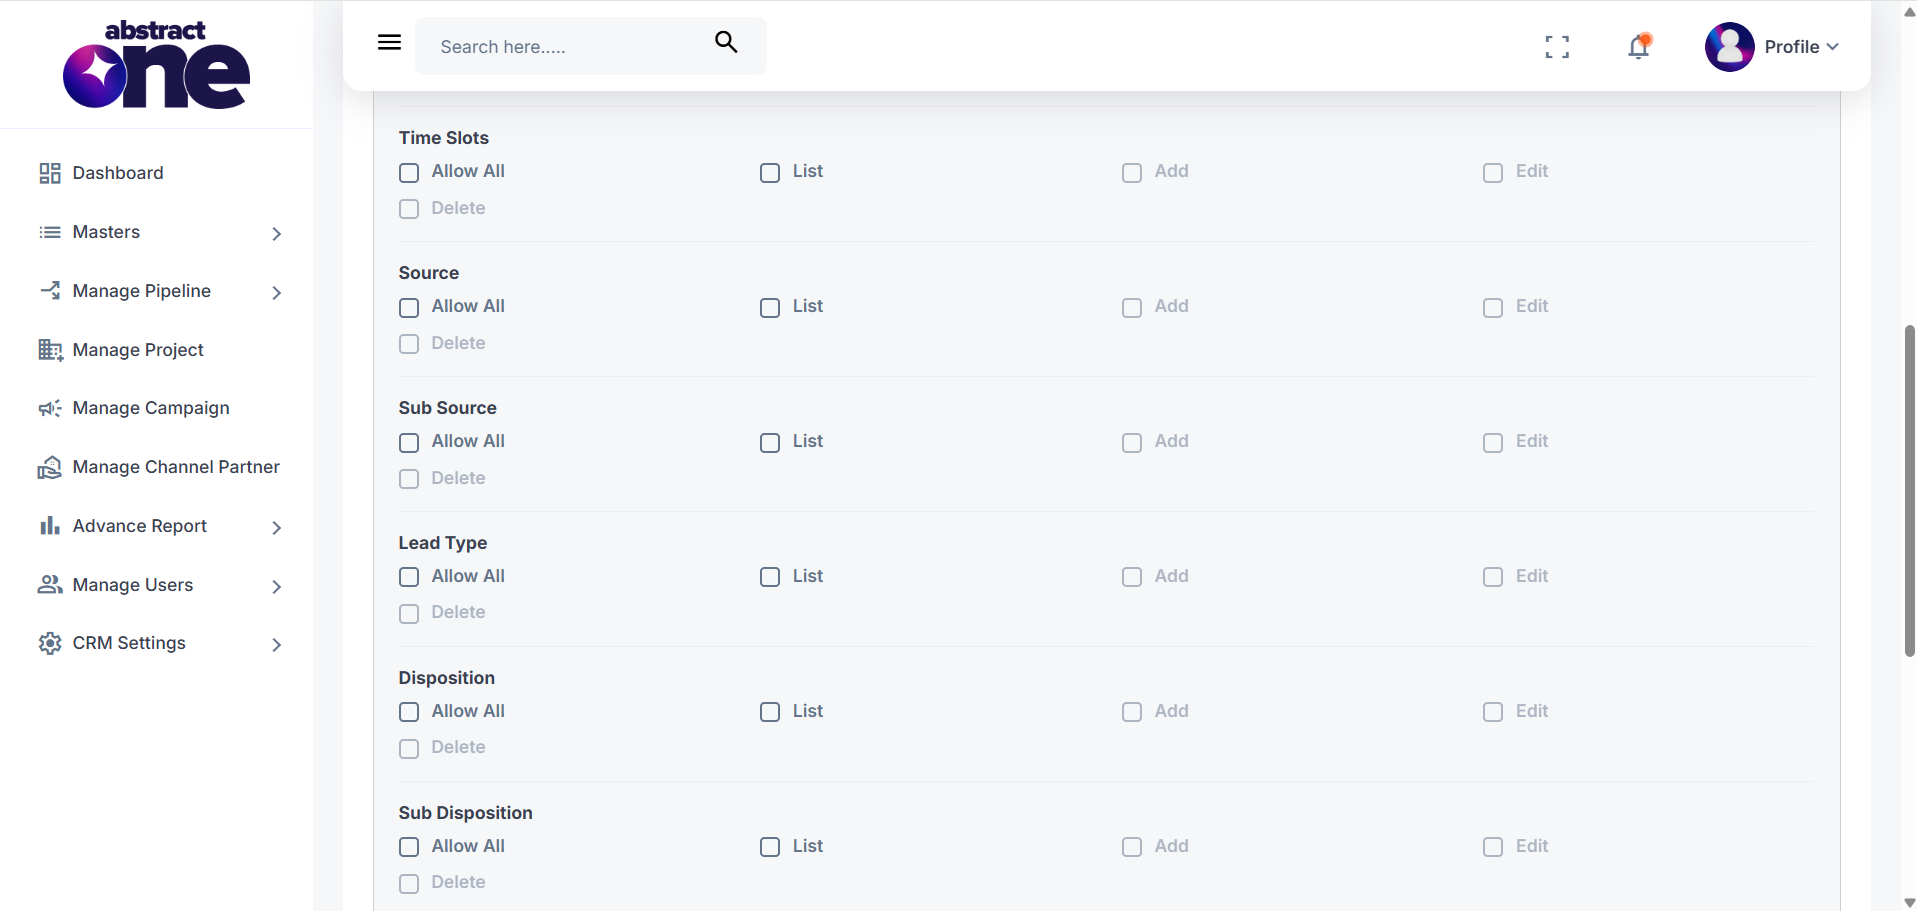
The Masters module allows administrators to control access to all master data used throughout the CRM. Each master section includes the following permissions:
- Allow All: Grants all available permissions for the selected master.
- List: Allows the user to view the records.
- Add: Allows the user to create new records.
- Edit: Allows the user to modify existing records.
- Delete: Allows the user to remove records.
The available master sections are:
- Configuration
- Location
- Lead Tag
- Time Slots
- Source
- Sub Source
- Lead Type
- Disposition
- Sub Disposition
Select the required permissions for each master section based on the responsibilities of the role. Use Allow All to assign every permission for a particular master with a single click. After configuring the permissions, click Save to apply the changes.
Manage Pipeline Module Permissions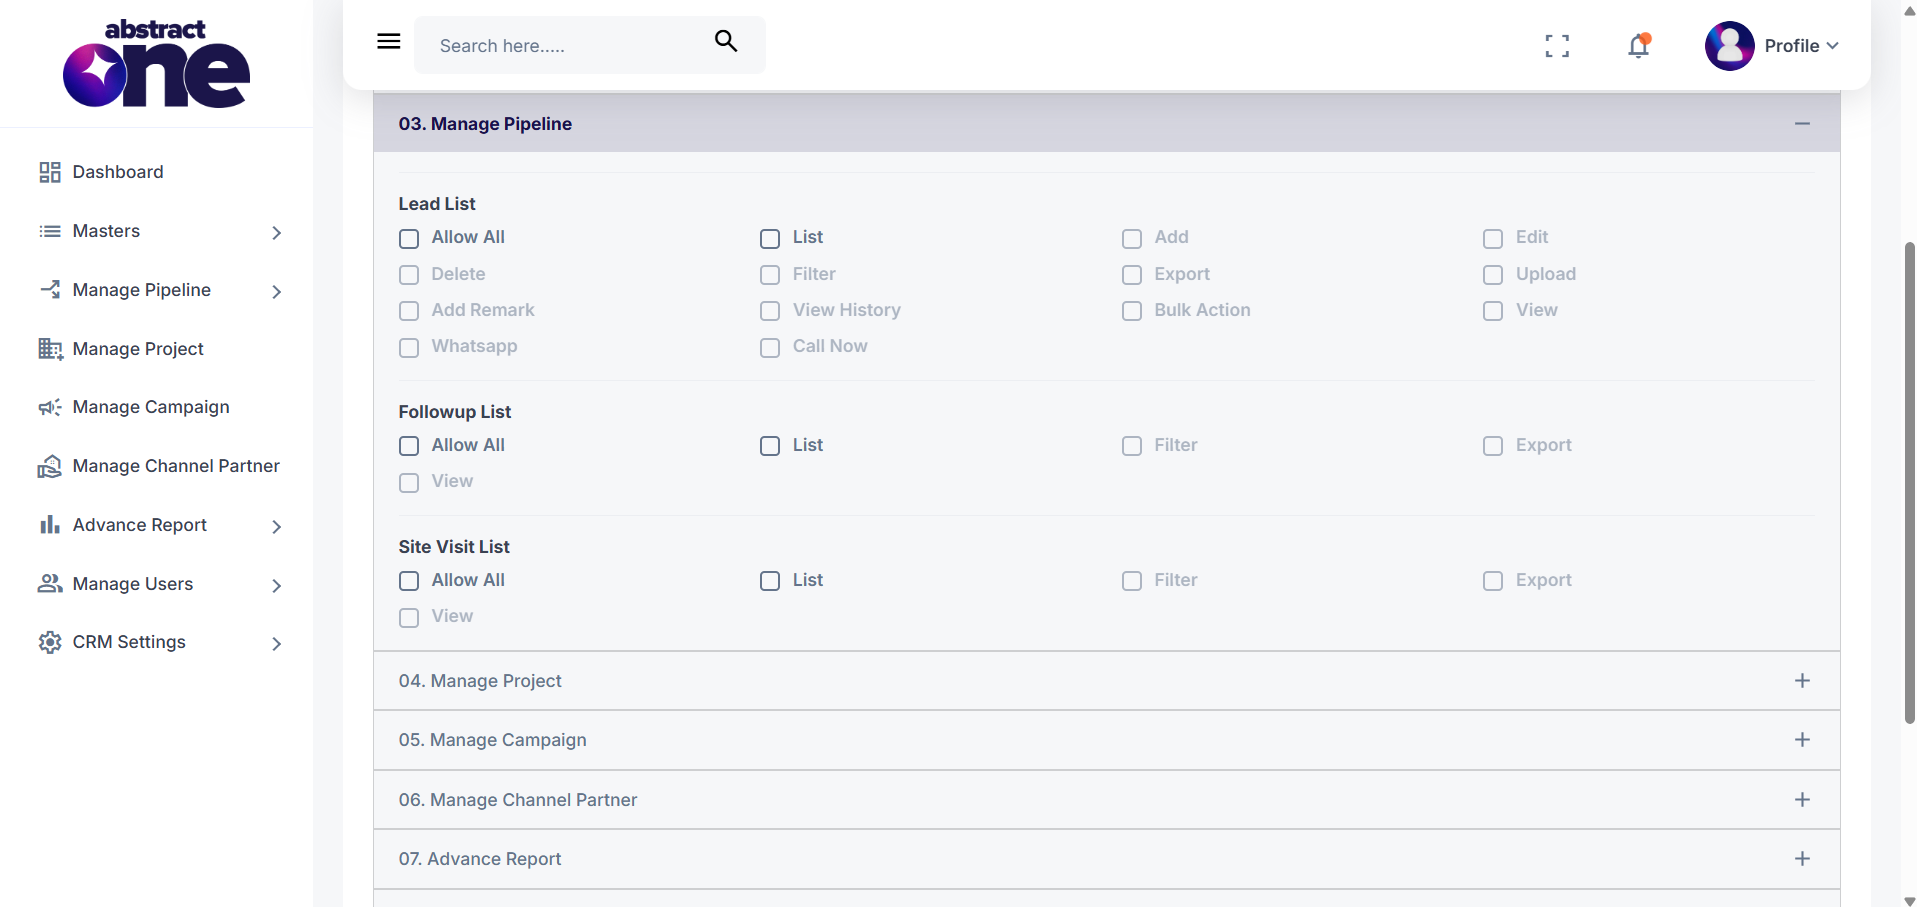
The Manage Pipeline module controls user access to lead management and follow-up activities within the CRM. Permissions can be assigned separately for each section.
1. Lead List
Configure permissions for managing leads.
Available permissions:
- Allow All – Grants all permissions for the Lead List.
- List – View the list of leads.
- Add – Create new leads.
- Edit – Modify existing lead details.
- Delete – Remove leads.
- View – View complete lead information.
- Filter – Apply filters to the lead list.
- Export – Export lead data.
- Upload – Import leads in bulk.
- Add Remark – Add remarks or notes to leads.
- View History – View lead activity history.
- Bulk Action – Perform actions on multiple leads simultaneously.
- WhatsApp – Send WhatsApp messages to leads.
- Call Now – Initiate calls directly from the CRM.
2. Follow-up List
Manage follow-up records and scheduled activities.
Available permissions:
- Allow All
- List
- View
- Filter
- Export
3. Site Visit List
Manage customer site visit records.
Available permissions:
- Allow All
- List
- View
- Filter
- Export
Select the required permissions for each section according to the responsibilities of the selected role. Once all permissions have been configured, click Save to apply the changes.
Manage Project Module Permissions
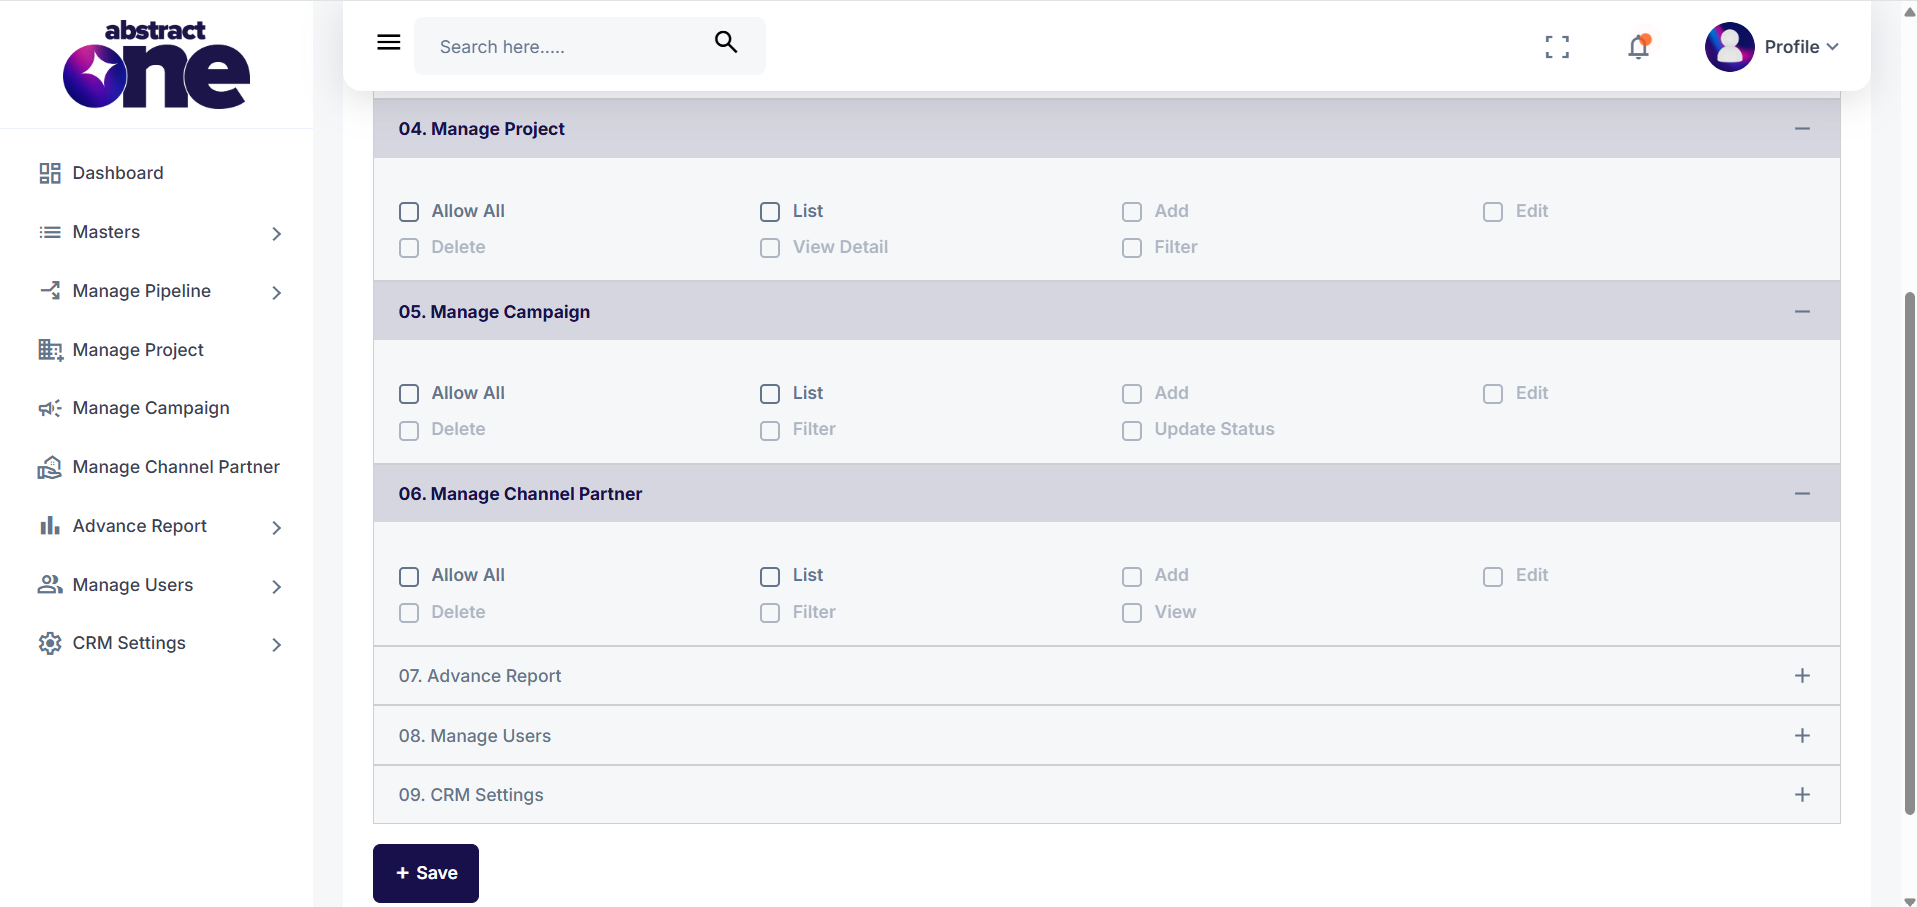
The Manage Project module allows administrators to control user access to project management features.
Available permissions:
- Allow All – Grants all permissions for the Manage Project module.
- List – Allows the user to view the list of projects.
- Add – Allows the user to create new projects.
- Edit – Allows the user to modify project details.
- Delete – Allows the user to remove projects.
- View Detail – Allows the user to view complete project information.
- Filter – Allows the user to filter the project list.
Manage Campaign Module Permissions
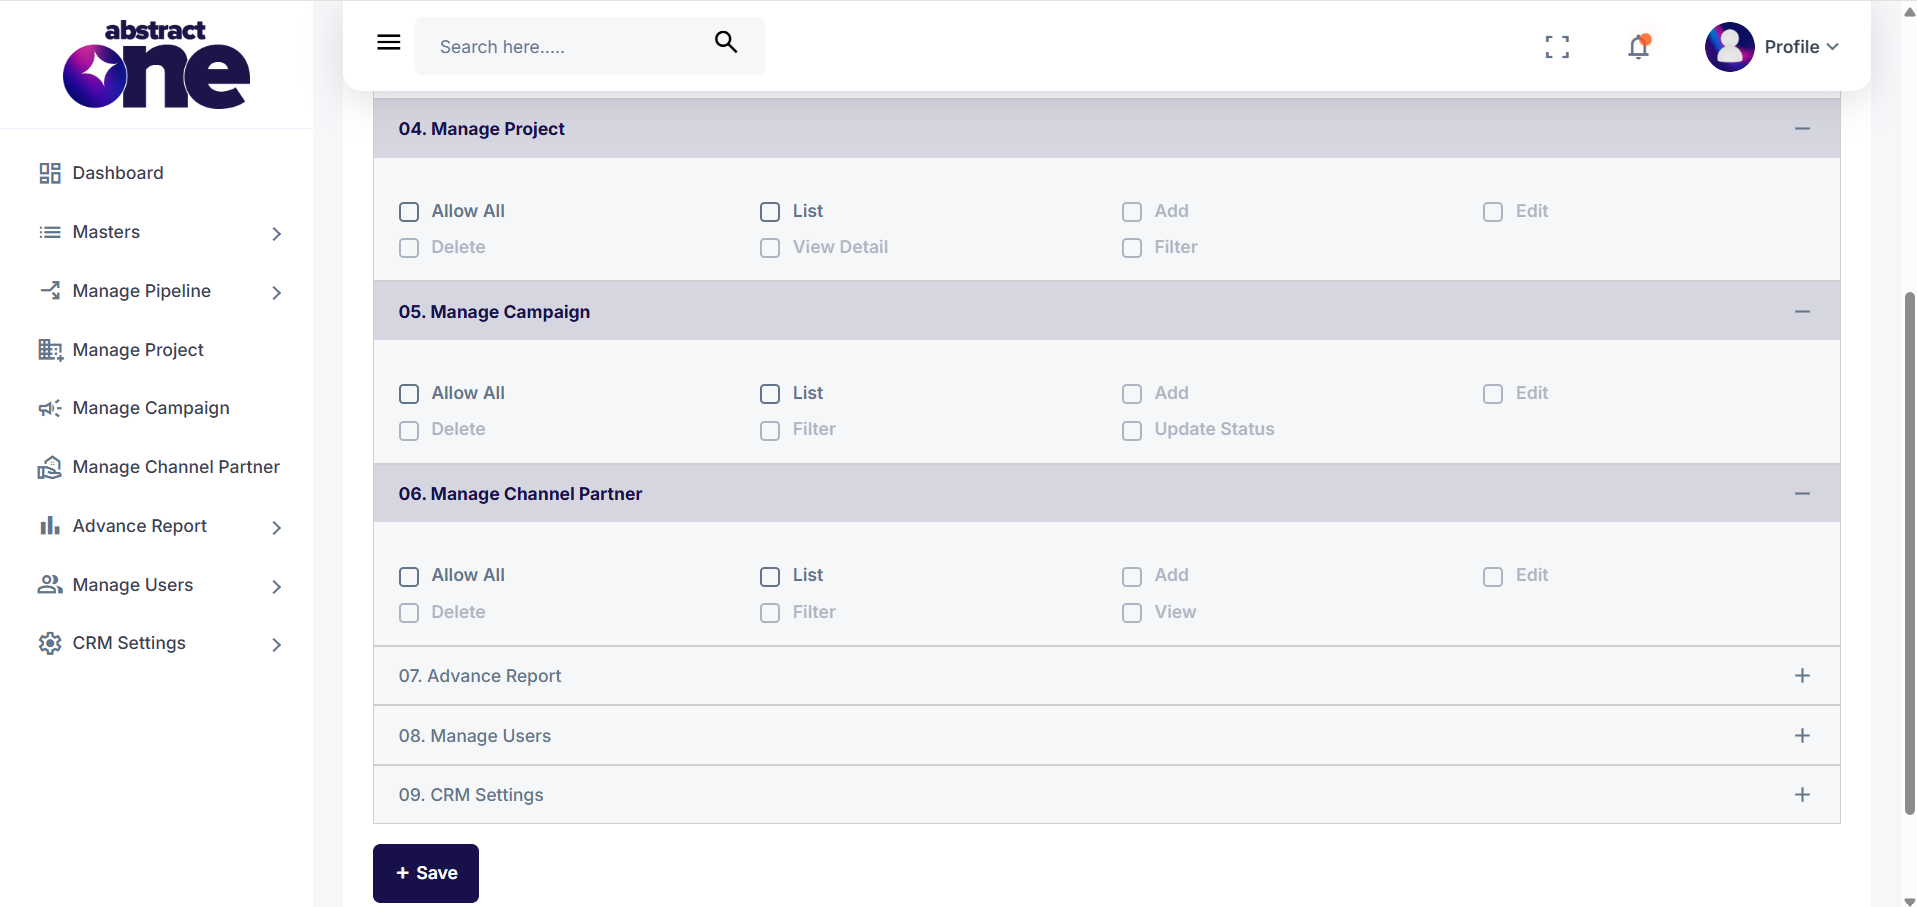
The Manage Campaign module controls access to campaign management functions.
Available permissions:
- Allow All – Grants all permissions for the Manage Campaign module.
- List – Allows the user to view the list of campaigns.
- Add – Allows the user to create new campaigns.
- Edit – Allows the user to modify campaign details.
- Delete – Allows the user to remove campaigns.
- Filter – Allows the user to search and filter campaign records.
- Update Status – Allows the user to change the status of campaigns.
Manage Channel Partner Module Permissions
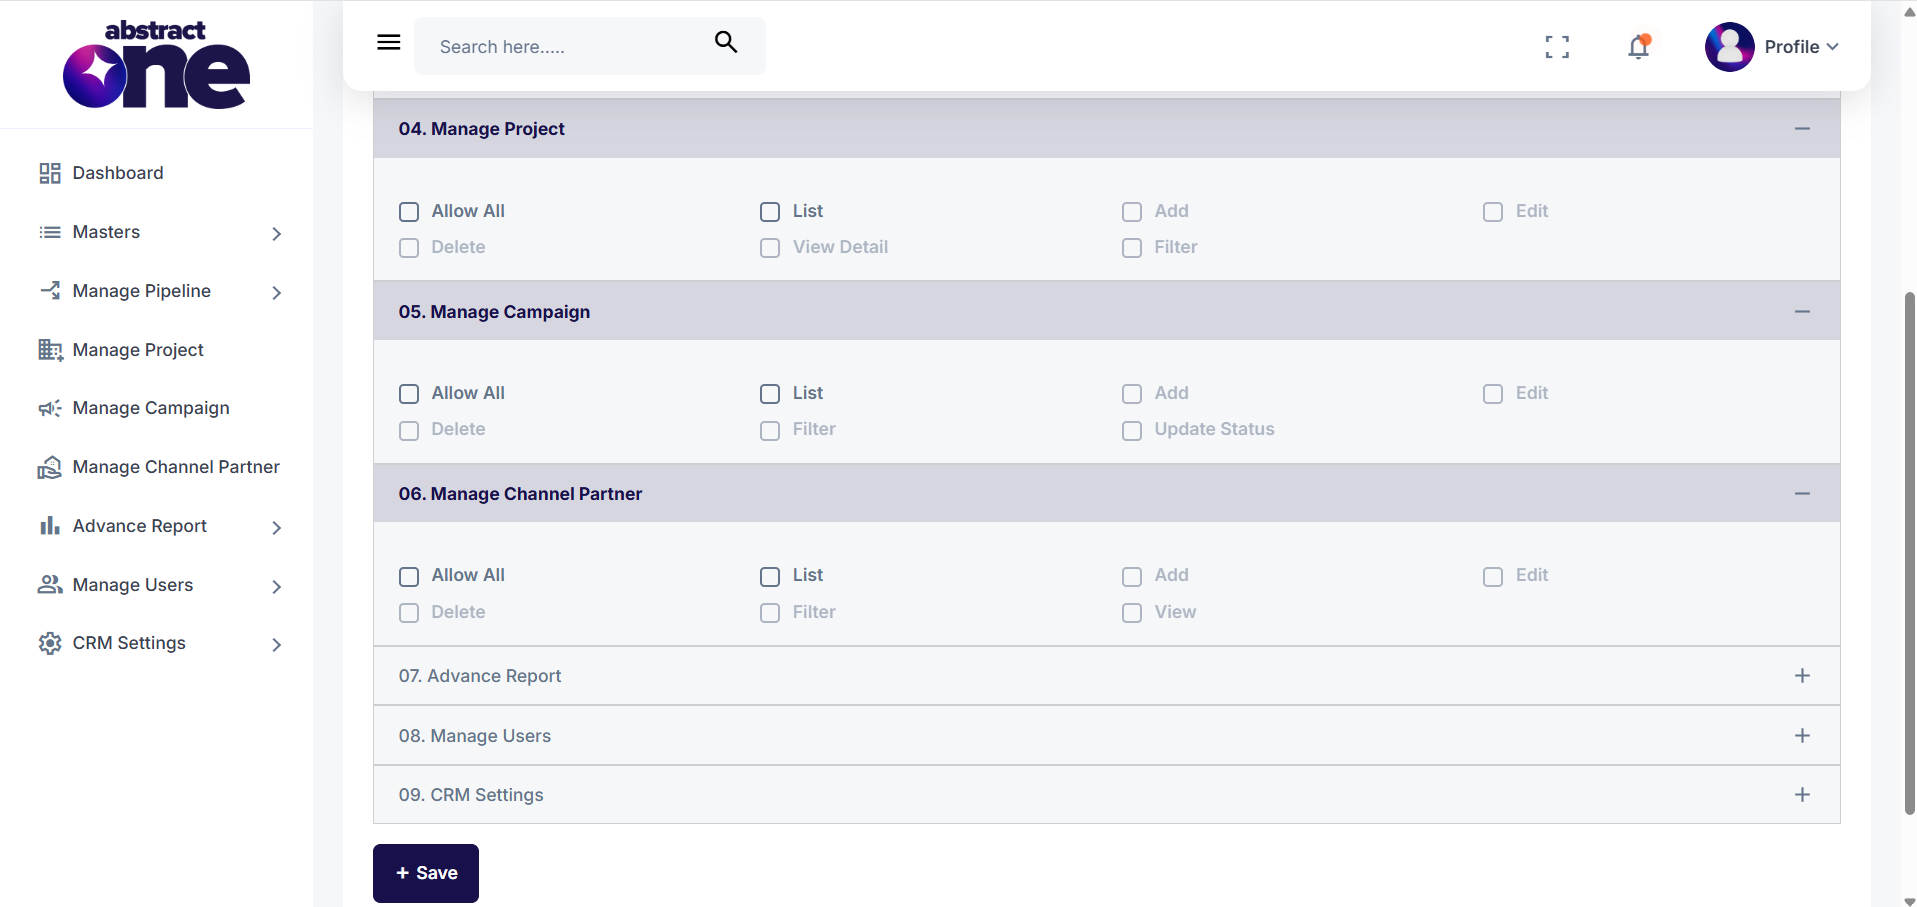
The Manage Channel Partner module allows administrators to define access for managing channel partner records.
Available permissions:
- Allow All – Grants all permissions for the Manage Channel Partner module.
- List – Allows the user to view the list of channel partners.
- Add – Allows the user to add new channel partners.
- Edit – Allows the user to modify channel partner details.
- Delete – Allows the user to remove channel partner records.
- View – Allows the user to view complete channel partner details.
- Filter – Allows the user to search and filter channel partner records.
After configuring the required permissions for each module, click Save to apply the changes to the selected role.
Advance Report Module Permissions
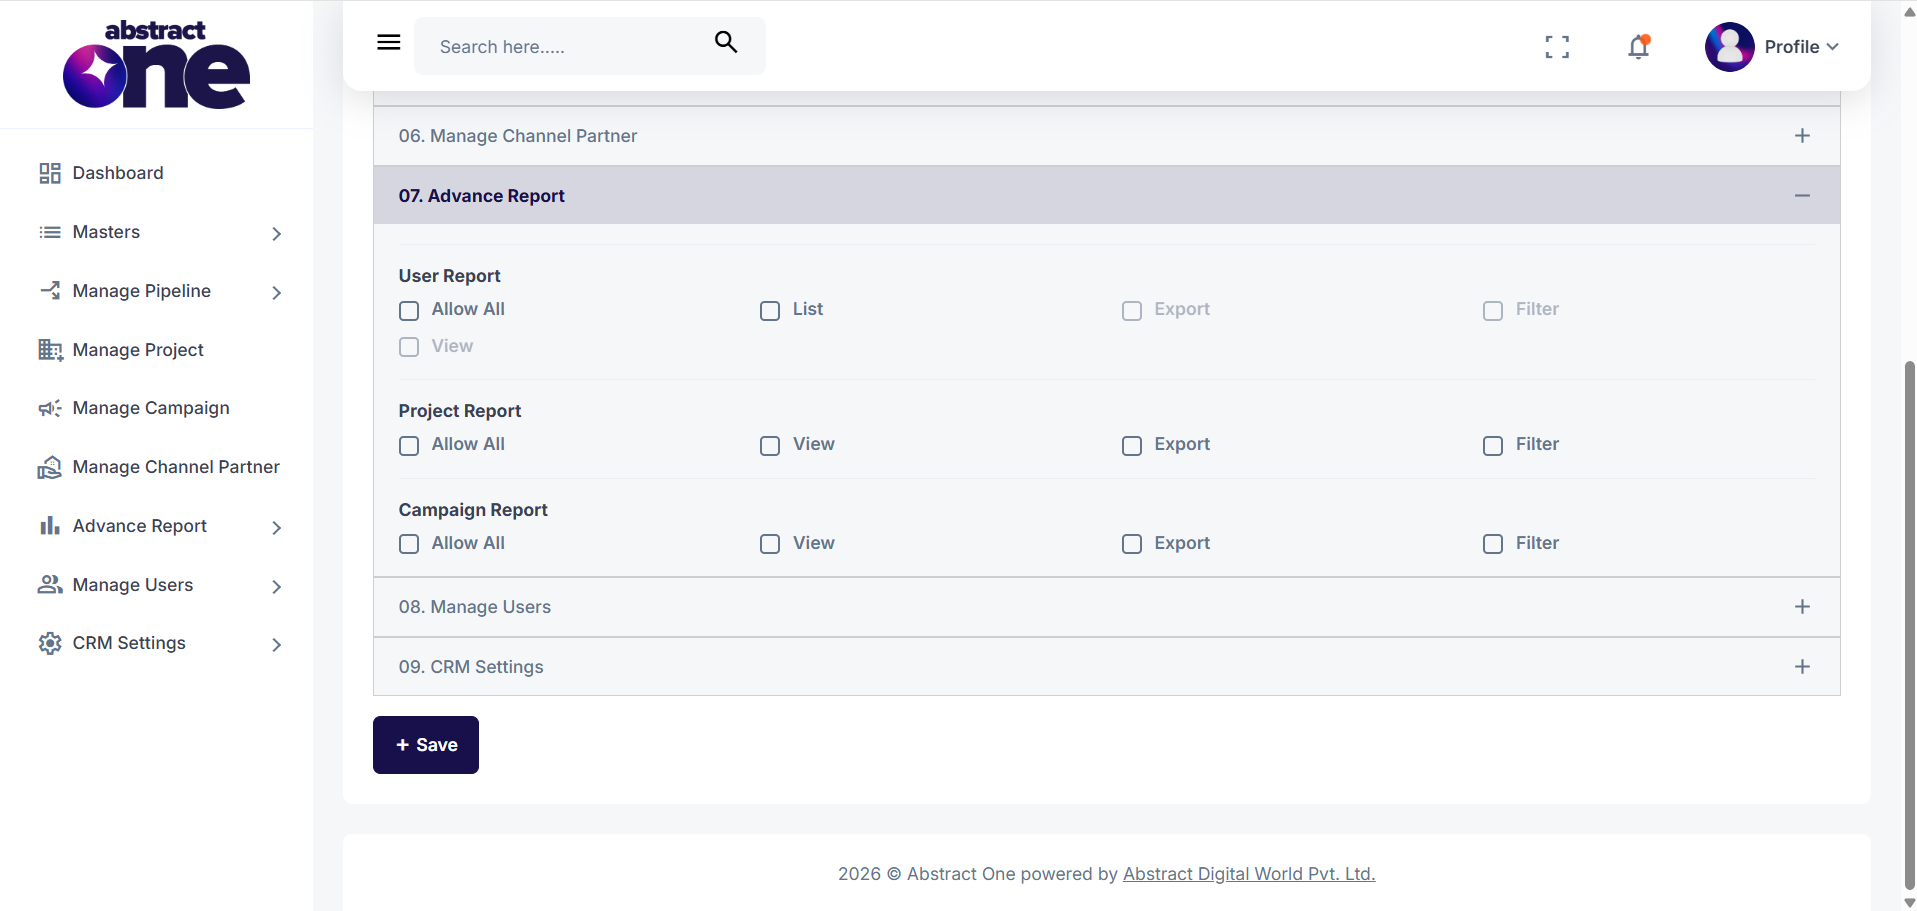
The Advance Report module allows administrators to control access to various CRM reports. Permissions can be assigned individually for each report type.
1. User Report
Configure access to user performance and activity reports.
Available permissions:
- Allow All – Grants all permissions for the User Report.
- List – Allows the user to access the User Report.
- View – Allows the user to view detailed report information.
- Export – Allows the user to export the report.
- Filter – Allows the user to apply filters to refine report data.
2. Project Report
Configure access to project-related reports.
Available permissions:
- Allow All – Grants all permissions for the Project Report.
- View – Allows the user to view project reports.
- Export – Allows the user to export project reports.
- Filter – Allows the user to filter report data.
3. Campaign Report
Configure access to campaign performance reports.
Available permissions:
- Allow All – Grants all permissions for the Campaign Report.
- View – Allows the user to view campaign reports.
- Export – Allows the user to export campaign reports.
- Filter – Allows the user to filter campaign report data.
Assign the required permissions based on the responsibilities of the selected role. Once all permissions have been configured, click Save to apply the changes.
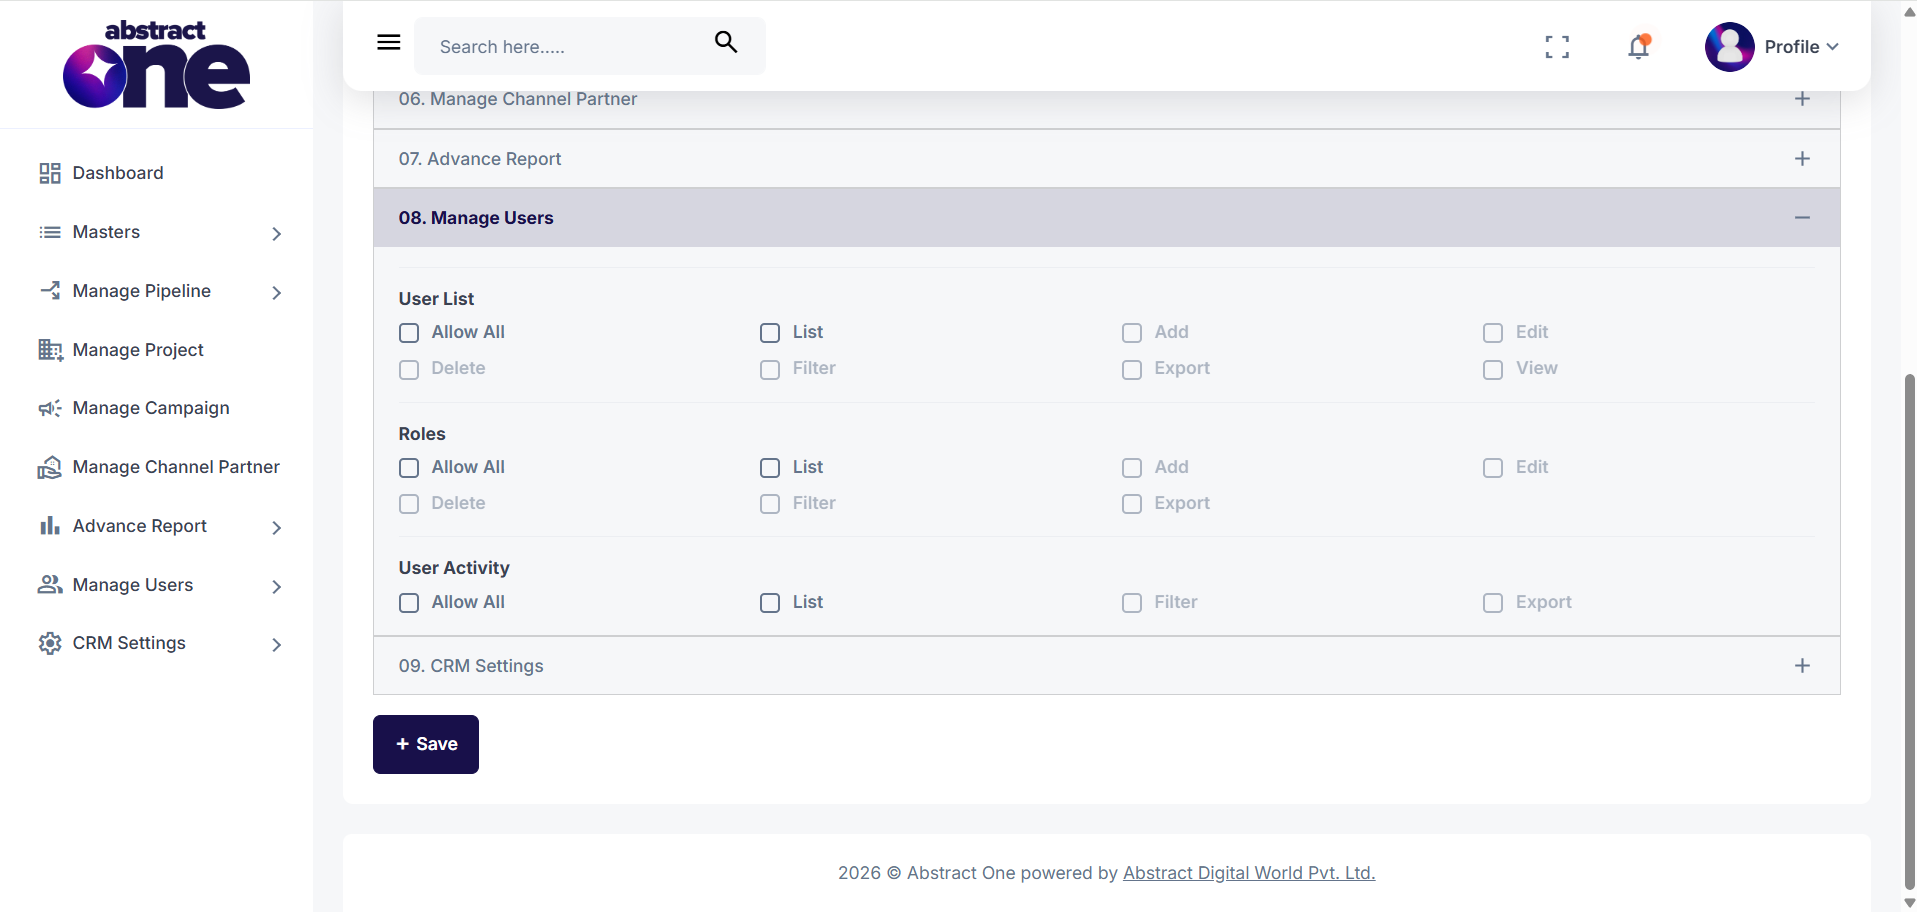
Manage Users Module Permissions
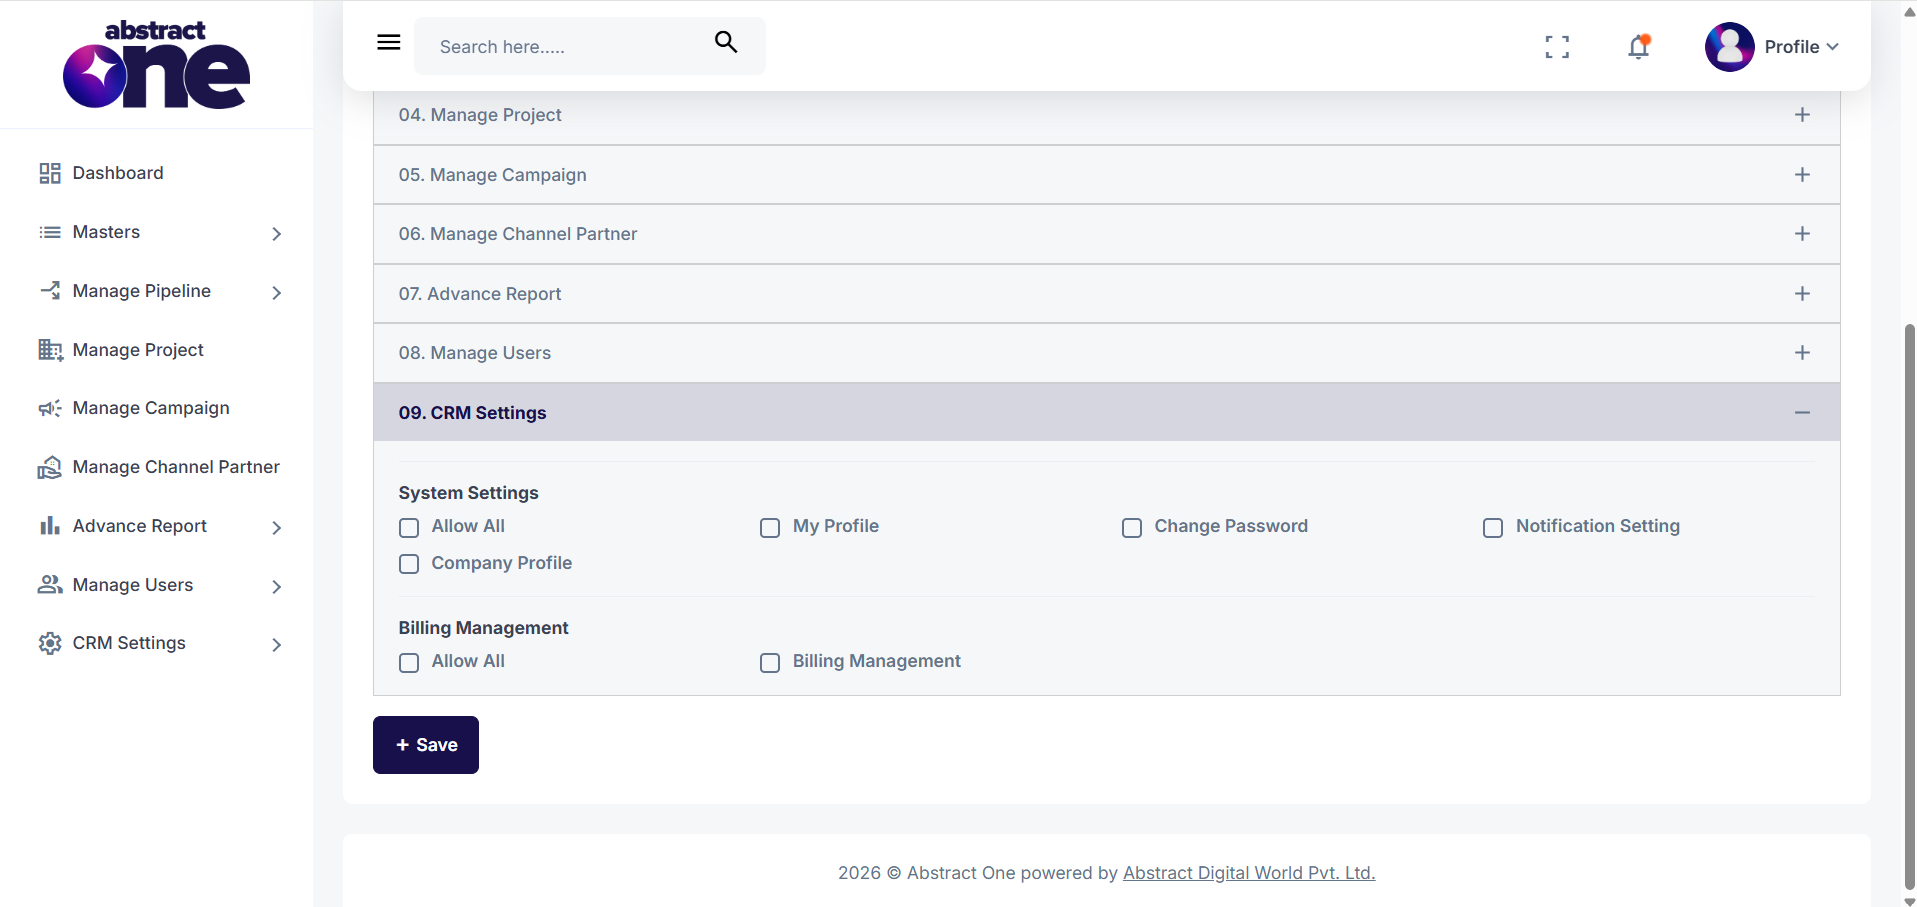
CRM Settings Module Permissions